
Hey guys, in this article, am going to show you how to implement multiple role-based authentication in Laravel even if you have many different users and multiple dashboards respectively.
Before we delve into achieving that, let me breakdown my scenarios or problems I was facing in a project I was working on for a company, which made me spend almost two weeks trying to figure it out.
By the way, if you’re just STARTING out with Laravel, I have created a Complete Laravel Guide just for you.
In this project, I was presented with six (6) different users and their respective dashboards too, the users were as follows viz:
- Super Admin
- Admin
- Players
- Teams
- Academics
- Scouts
So, the problem was to redirect the users to their respective dashboards on successful logins and restrict access to any other dashboards even if they typed in the URL to or try to access the other dashboard, it should redirect them back to their default dashboard.
As I read through many blog posts, video tutorials, and questionings which were great, I discovered that whenever I successfully implement a solution.
I will always discover a fault during security tests/checks such as “too many redirect errors” or enabling a logged-in player to access a scout dashboard, etc.
I also discovered many solutions such as the use of guards, middleware, etc. which helped tremendously.
If you are using Laravel 8 above, look at how to implement multiple role-based authentications in Laravel 8.
GETTING STARTED
Enough of the house keeping things, let move down to how I successfully implement multiple role-based authentication in Laravel and save myself two weeks of sleepless nights.
We will start by installing a fresh new Laravel project, you can skip these steps if you are comfortable with it.
Take a break and subscribe to get access to our free Laravel tips that will improve your productivity.
CREATING A FRESH LARAVEL
Type in the following commands in your projects folder assuming you have php 7.* and composer installed. You can check here to learn how to install Laravel.
composer create-project --prefer-dist laravel/laravel MultiAuthSETTING UP YOUR DATABASE AND .env FILE
The next step is to set up your database migrations and configuring your environment file.
Go to your phpMyAdmin and create a database.
Open your user migration file and add the following columns
<?php
use Illuminate\Support\Facades\Schema;
use Illuminate\Database\Schema\Blueprint;
use Illuminate\Database\Migrations\Migration;
class CreateUsersTable extends Migration
{
    /**
     * Run the migrations.
     *
     * @return void
     */
    public function up()
    {
        Schema::create('users', function (Blueprint $table) {
            $table->increments('id');
            $table->string('name');
            $table->string('phone');
            $table->string('state');
            $table->string('email')->unique();
            $table->integer('role');
            $table->timestamp('email_verified_at')->nullable();
            $table->string('password');
            $table->integer('status_id')->nullable();
            $table->rememberToken();
            $table->timestamps();
        });
    }
    /**
     * Reverse the migrations.
     *
     * @return void
     */
    public function down()
    {
        Schema::dropIfExists('users');
    }
}
After that, open your .env file and pass in your database credentials
Run your migrations
php artisan migrateYou can set up database seeders to fill your database with data or you can add it manually, whichever way is good, or you can simply use my code examples since I have set up a database seeder already just for this example.
SETTING UP USER AUTH.
After setting up your database and running migrations, the next step is to use Laravel default authentication which is just fine for our example, Thanks to Laravel teams.
By just running:
php artisan make:authYou should successfully set up a complete user registration and login system out of the box, now visit your newly created Laravel project by typing.
php artisan serveAnd typing 127.0.0.1:8000 in the browser.
At this stage, you can decide to seed six (6) different users with corresponding user role or manually insert them in the database.
So, our user role is going to be numerical as follows:
- Super Admin
- Admin
- Player
- Team
- Academic
- Scout
After properly seeding the dummy user data, if you are happy with it, lets move to the next step.
CREATING DASHBOARD CONTROLLERS
The next step will be to create the different dashboard controllers for the different users. Type
php artisan make:controller AdminControllerphp artisan make:controller PlayerControllerRepeat until you complete the six (6) dashboards.
CREATING MIDDLEWARES
After creating the different controllers, the next step is to create the different middleware corresponding to the different user roles.
php artisan make:middleware Adminphp artisan make:middleware PlayerRepeat until you complete the six (6) middlewares.
After creating the middleware, now go into the kernel.php file under the $routeMiddleware array and register them.
<?php
/**
     * The application's route middleware.
     *
     * These middleware may be assigned to groups or used individually.
     *
     * @var array
     */
    protected $routeMiddleware = [
        'auth' => \App\Http\Middleware\Authenticate::class,
        'auth.basic' => \Illuminate\Auth\Middleware\AuthenticateWithBasicAuth::class,
        'bindings' => \Illuminate\Routing\Middleware\SubstituteBindings::class,
        'cache.headers' => \Illuminate\Http\Middleware\SetCacheHeaders::class,
        'can' => \Illuminate\Auth\Middleware\Authorize::class,
        'guest' => \App\Http\Middleware\RedirectIfAuthenticated::class,
        'signed' => \Illuminate\Routing\Middleware\ValidateSignature::class,
        'throttle' => \Illuminate\Routing\Middleware\ThrottleRequests::class,
        'verified' => \Illuminate\Auth\Middleware\EnsureEmailIsVerified::class,

        'player' => \App\Http\Middleware\Player::class,
        'admin' => \App\Http\Middleware\Admin::class,
        'superadmin' => \App\Http\Middleware\SuperAdmin::class,
        'scout' => \App\Http\Middleware\Scout::class,
        'team' => \App\Http\Middleware\Team::class,
        'academy' => \App\Http\Middleware\Academic::class,
    ];
After registering the middleware appropriately, the next step is assigning the middleware to the different controllers or routes you want to protect.
SETTING UP VIEWS AND ROUTES
Go to your views folder and create different view dashboards.
Remember the dashboard files can be inside different folders, it doesn’t matter, just route them correctly inside your controllers.
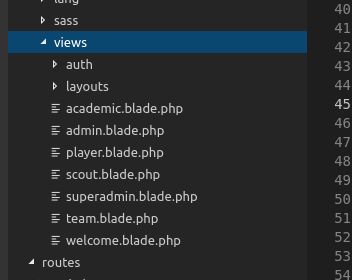
Inside each of the dashboards, I added a dummy text, just to demonstrate.
<?php
@extends('layouts.app')

@section('content')
<div class="container">
    <div class="row justify-content-center">
        <div class="col-md-8">
            <div class="card">
                <div class="card-header">Dashboard</div>

                <div class="card-body">
                    @if (session('status'))
                        <div class="alert alert-success" role="alert">
                            {{ session('status') }}
                        </div>
                    @endif

                    You are in ADMIN Dashboard!
                </div>
            </div>
        </div>
    </div>
</div>
@endsection
After creating the view, go to web.php, under the routes folder, and set up the different routes to access the different dashboards.
<?php
/*
|--------------------------------------------------------------------------
| Web Routes
|--------------------------------------------------------------------------
|
| Here is where you can register web routes for your application. These
| routes are loaded by the RouteServiceProvider within a group which
| contains the "web" middleware group. Now create something great!
|
*/
Route::get('/', function () {
    return view('welcome');
});
Auth::routes();
Route::get('/player', 'PlayerController@index')->name('player')->middleware('player');
Route::get('/admin', 'AdminController@index')->name('admin')->middleware('admin');
Route::get('/superadmin', 'SuperAdminController@index')->name('superadmin')->middleware('superadmin');
Route::get('/scout', 'ScoutController@index')->name('scout')->middleware('scout');
Route::get('/team', 'TeamController@index')->name('team')->middleware('team');
Route::get('/academy', 'AcademicController@index')->name('academy')->middleware('academy');
// Route::get('/home', 'AcademicController@index')->name('home');
Now, here is the interesting part, in my example or project, I prefer assigning the middleware to the routes instead of adding it into the Controller constructors.
EDITING THE MIDDLEWARE
After registering and assigning the middleware to the routes or controllers, let edit the contents of each of the middlewares.
So, inside the handle method, check if the user is Authenticated and redirect according to the user role to the different dashboards.
<?php

namespace App\Http\Middleware;

use Auth;
use Closure;

class Player
{
    /**
     * Handle an incoming request.
     *
     * @param  \Illuminate\Http\Request  $request
     * @param  \Closure  $next
     * @return mixed
     */
    public function handle($request, Closure $next)
    {
        if (!Auth::check()) {
            return redirect()->route('login');
        }

        if (Auth::user()->role == 1) {
            return redirect()->route('superadmin');
        }

        if (Auth::user()->role == 5) {
            return redirect()->route('academy');
        }

        if (Auth::user()->role == 6) {
            return redirect()->route('scout');
        }

        if (Auth::user()->role == 4) {
            return redirect()->route('team');
        }

        if (Auth::user()->role == 3) {
            return $next($request);
        }

        if (Auth::user()->role == 2) {
            return redirect()->route('admin');
        }
    }

}
EDITING THE LOGIN AND REGISTER CONTROLLER
After a successful login, you need to redirect the user to the appropriate dashboard based on the user role.
<?php
namespace App\Http\Controllers\Auth;
use App\Http\Controllers\Controller;
use Illuminate\Foundation\Auth\AuthenticatesUsers;
use Auth;
class LoginController extends Controller
{
    /*
    |--------------------------------------------------------------------------
    | Login Controller
    |--------------------------------------------------------------------------
    |
    | This controller handles authenticating users for the application and
    | redirecting them to your home screen. The controller uses a trait
    | to conveniently provide its functionality to your applications.
    |
    */
    use AuthenticatesUsers;
    /**
     * Where to redirect users after login.
     *
     * @var string
     */
    protected $redirectTo;
    public function redirectTo()
    {
        switch(Auth::user()->role){
            case 2:
            $this->redirectTo = '/admin';
            return $this->redirectTo;
                break;
            case 4:
                    $this->redirectTo = '/team';
                return $this->redirectTo;
                break;
            case 3:
                $this->redirectTo = '/player';
                return $this->redirectTo;
                break;
            case 5:
                    $this->redirectTo = '/academy';
                return $this->redirectTo;
                break;
            case 6:
                $this->redirectTo = '/scout';
                return $this->redirectTo;
                break;
            case 1:
                $this->redirectTo = '/superadmin';
                return $this->redirectTo;
                break;
            default:
                $this->redirectTo = '/login';
                return $this->redirectTo;
        }

        // return $next($request);
    }
    /**
     * Create a new controller instance.
     *
     * @return void
     */
    public function __construct()
    {
        // $this->middleware('guest')->except('logout');
    }
}
You can do the same with Register Controller or you can simply redirect users to the verify page and after verification.
You can redirect to the dashboard or login page again depending on your project.
CONCLUSIONS
If you are using Laravel 8 above, look at how to implement multiple role-based authentications in Laravel 8.
So far, the problem we have solved is preventing a logged-in user from accessing other users’ dashboards and also preventing “too many redirect errors” when working with guards wrongly.
We understand that there are many ways to kill a rat, we want to hear your thoughts and best practices on how to solve this same issue.
If you have encountered it before, how did you solve it, lets us hear it in the comment section below and we will update this post accordingly.
You can get the full source code here
Thank you for reading my article.
If you enjoy this post, make sure to let us know and share it with your friends.


