In this article, I’ll be showing you how to host your Laravel project on a shared hosting via CPanel we all know and love.
If you have a local server like WAMP or XAMPP, this would work to test it out before uploading it to our CPanel.
Before you dive in, if you’re a backend developer or looking at delving into this career path, join other developers to receive daily articles on backend development that will boost your productivity.
1. Create a Laravel Project
The first step to host your Laravel project on shared hosting via Cpanel is to create a Laravel project if you don’t have one.
By the way, if you’re just STARTING out with Laravel, I have created a Complete Laravel Guide just for you.
Feel free to check out the official Laravel docs for how to create one if you don’t already know how to.
2. Refactor the Directory Structure
Because the servers on our shared hosting look for an index.php or index.html file at the root to execute, we need to restructure our directory to make it work.
Your public folder should look like this after a new installation:

What you want to do is move those files to the root directory of your application.
If you already created a “symlink” to the storage folder in your project, please leave it in the public folder.
I’ll get back to why later. Also, please remember NOT TO TOUCH the .htaccess file and leave it as it is in your project’s root; unless you thoroughly know what you’re doing in which case, definitely make a backup :).
If you’ve successfully moved the files, your directory structure should look like this:

3. Edit Files to Reflect our New Directory Structure
Although shared hosting servers look for the index.php file at the directory root to execute our application, Laravel isn’t set up that way by default.
For Laravel work with our new directory structure, we have to edit a couple of files so everything can run properly.
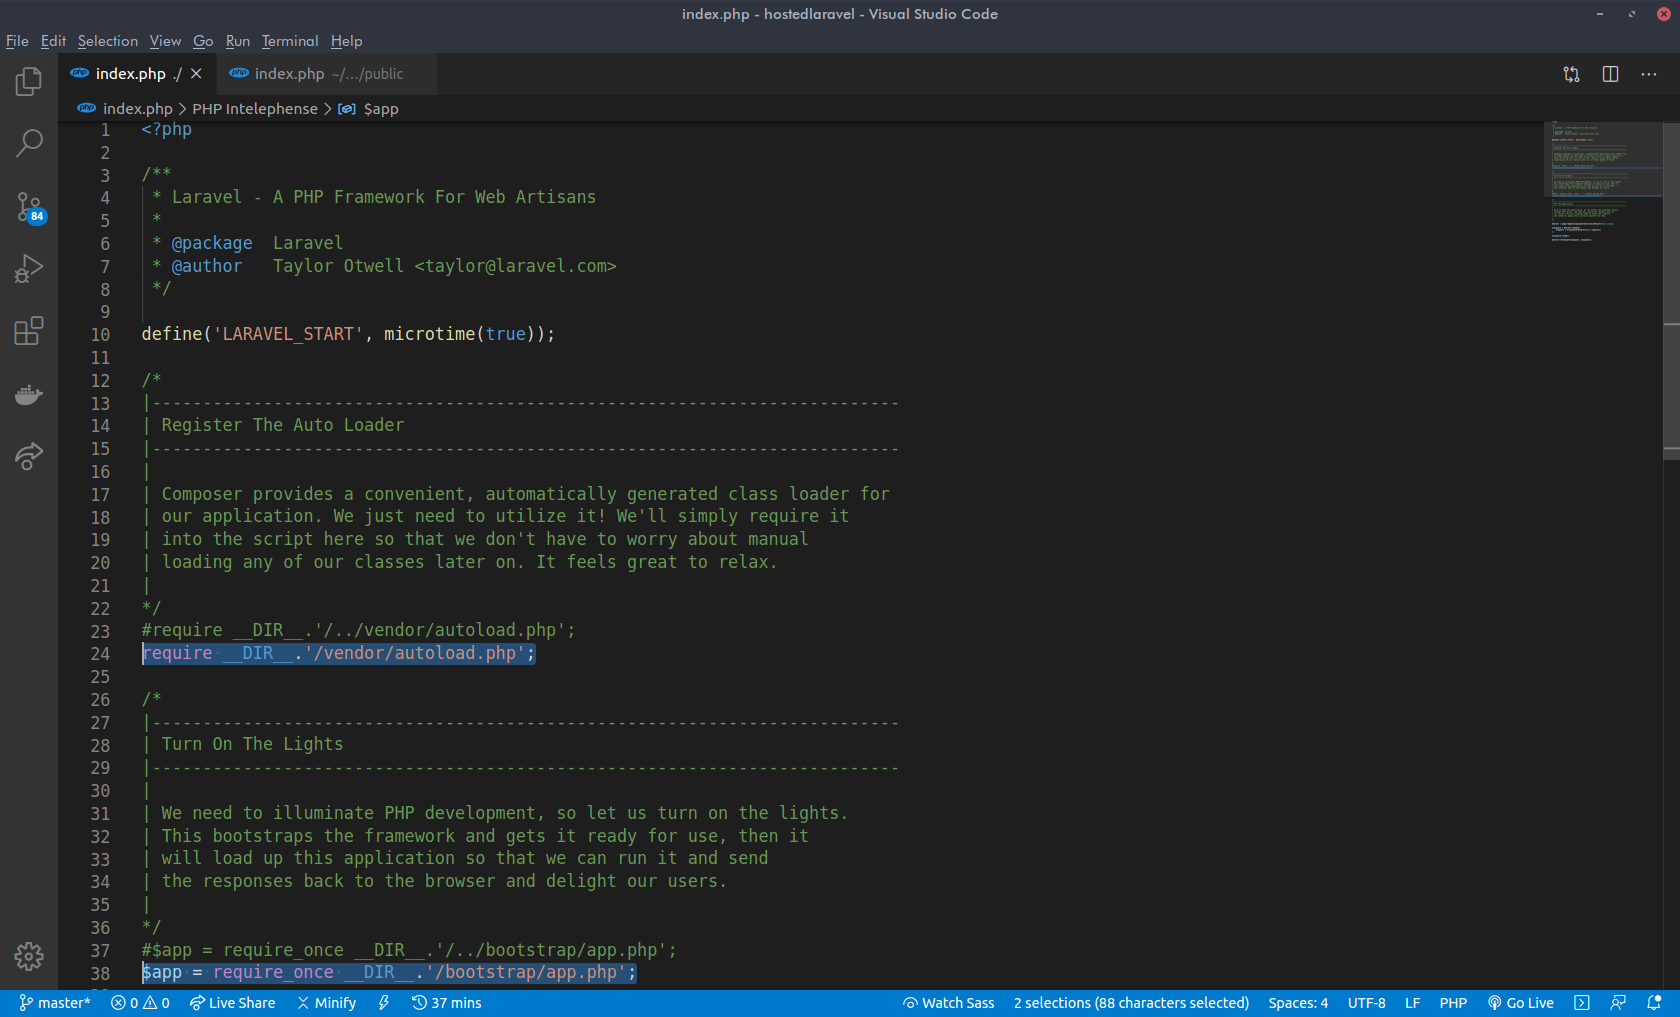
The first file we’ll be editing is the index.php file.

So the purpose of each line is commented in there by the lovely Laravel team but just to clarify what we’ve done here since we’ve moved the index.php file to the root, we need to change the path of these files so they can be found correctly.
On lines 24 and 38, we simply remove the ../ in front of the directory names.
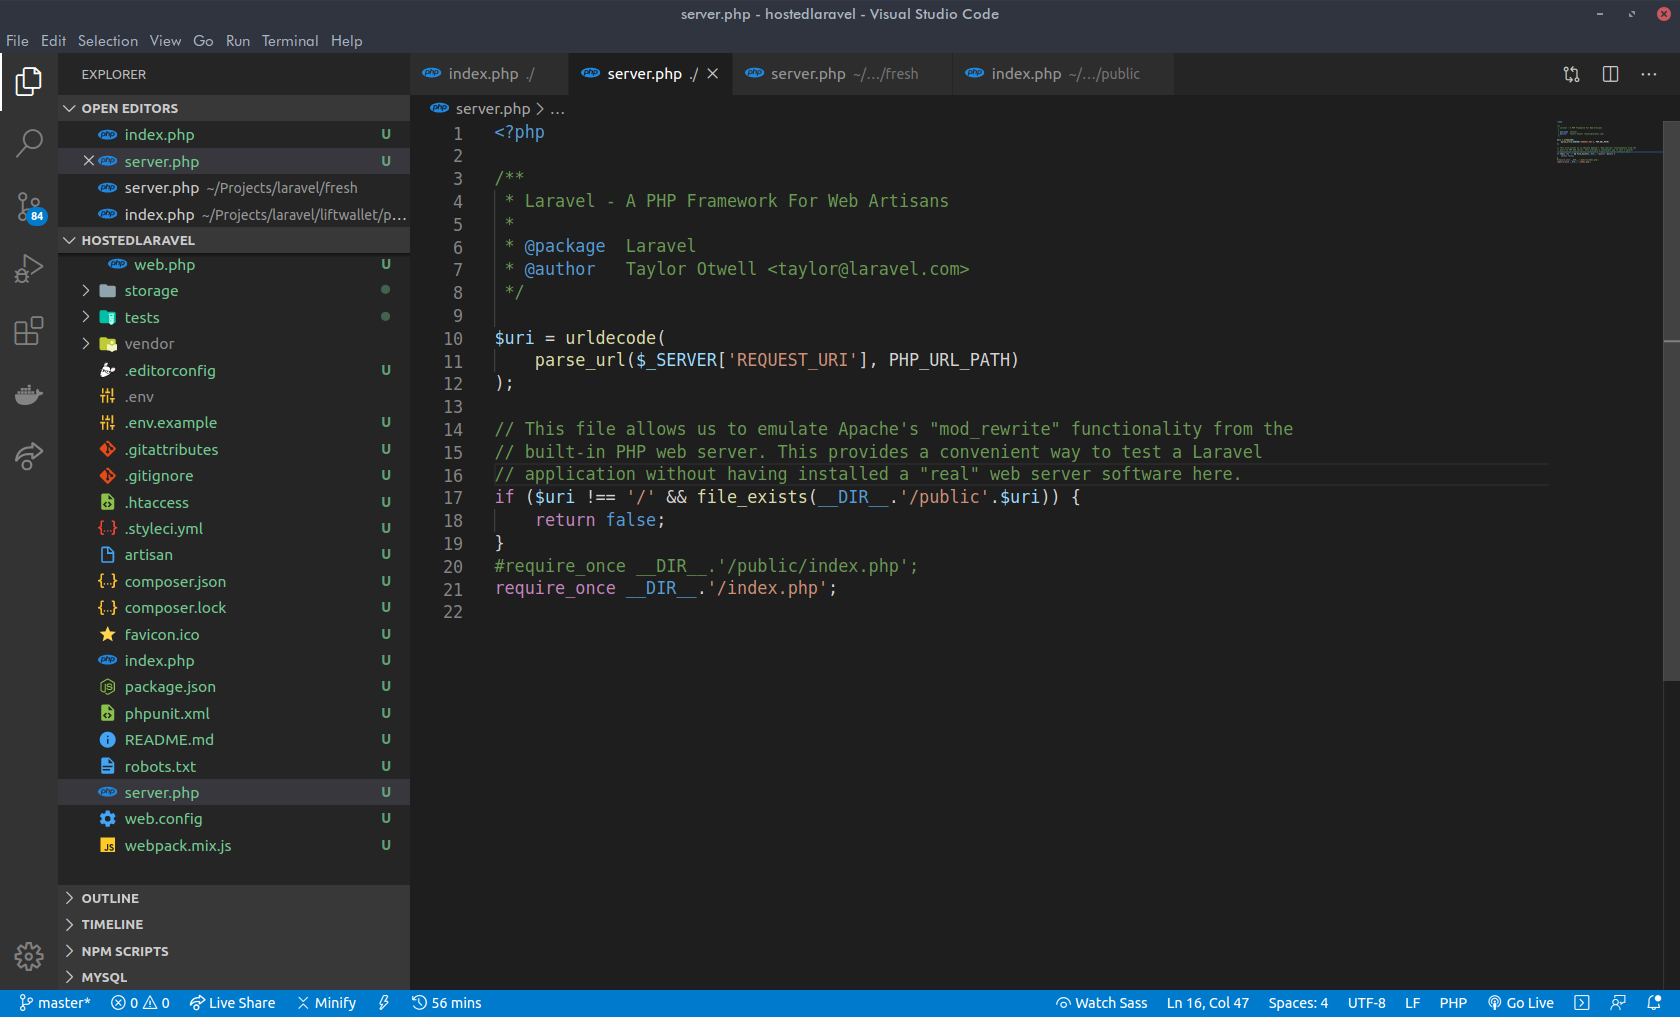
For newer versions of Laravel, we’d also need to go to the server.php file which is usually in our root by default and make a similar change to its content:

With this, our application should work properly if we test it.
4. (Optional) Hack to make Storage work like the Default
It is necessary to create a symlink to our storage folder from our public folder in order to allow us to create human-friendly URLs for our resources and assets like pictures, videos, and CSS.
For those who may not know what “symlinks” are, here is a really good tutorial for that.
Creating this symlink in Laravel is easy, just run this command from your terminal
php artisan storage:linkWhen we create a symlink in our project the way we left it in step 3, we would notice that the links don’t work quite the way they do in the default Laravel application URLs to a file stored in our storage folder would have to be located using <host name>/public/storage/<file> rather than the <host name>/storage/<file> that we’re used to.
There’s a small hack to fix this, all we need to do is create a route in our routes/web.php file.
Route::get(‘/storage/{extra}’, function ($extra) {
  return redirect(“/public/storage/$extra”);
})->where(‘extra’, ‘.*’);
What this block of code would do is redirect all requests made to /storage/<anything> to /public/storage/<anything> without any hiccups.
5. We’re done here
At this point, we’re done.
What’s left to do is upload this to our CPanel’s htdocs, public_html, www (whatever it’s called there) or in the directory of the subdomain, doesn’t matter if you do it via FTP or if you compress it and upload it directly
In order to configure your database connection, feel free to set the database credentials in the .env file located at the root of your project like you would normally do and show your beautiful project to the world.
Before we dive into the article, subscribe to get access to our free laravel tips that will improve your productivity.
Conclusion
It’s not a daunting task to have your Laravel projects hosted on a shared hosting via CPanel if you’d rather not use a Private Hosting.
Feel free to leave any comments on this if you liked it or have any questions or ran into hiccups along the way and I’ll gladly respond.
Cheers!


