
In this article, we are going to be learning how to authenticate users in our React app using firebase auth.
When building an application that requires users to sign In and sign out in other to have access to some personal data or access to some private sections of an application then authentication is an important approach that allows us to achieve that.
Authentication is both important to users and developers. For users, it prevents a user’s account to be accessed by the external user who is trying to access the account using credentials that are different from what the original user used when creating the account.
For developers, it helps create a secure website where users who are not authenticated, are not allowed access to private pages on the website that is meant only for users who are authenticated (who have an account with the application).
To achieve this authentication we would need to have a working backend system and this can really be time-consuming especially if you are just a frontend developer working on a project without any backend developer, this is what firebase helps to solve.
Firebase helps us to focus more on building a responsive and dynamic application to give users an amazing user experience and not focus on the complex infrastructure like backend services to support them. Firebase provides us with all the backend services like authentication that we need to build an application
So with that basic introduction out of the way let’s look at what firebase is in the next section.
What is Firebase
According to Wikipedia Firebase is a set of hosting services for any type of application (Android, iOS, Javascript, Node.js, Java, Unity, PHP, C++ …). It offers NoSQL and real-time hosting of databases, content, social authentication (Google, Facebook, Twitter, and Github), and notifications, or services, such as a real-time communication server.
for this article since we are working with React which is a JavaScript library for building an amazing user interface which is mainly the front end, we will focus on using firebase just for the backend.
So we can define firebase as an Authentication provider, which provides backend services, easy-to-use SDKs, and ready-made UI libraries.
When building an application that requires authenticating a user, we will need a backend system to store the user’s credentials, but rather than build a backend system, we can firebase and get access to all its backend services.
Ways to authenticate a user in firebase
When it comes to authentication, there are several ways a user can be authenticated but the major ones include using the user’s email address/password and, third-party providers such as Twitter, Facebook, Github, Google, Microsoft, and many more
Firebase supports all these ways for users to get authenticated.
To be able to use the firebase platform then you will need to have an account. So if you don’t have an account just click here to create an account, if you already have an account then skip to the next section.
How to Set Up Firebase for Authentication
If you have successfully signed in, you should see your screen just like the picture below
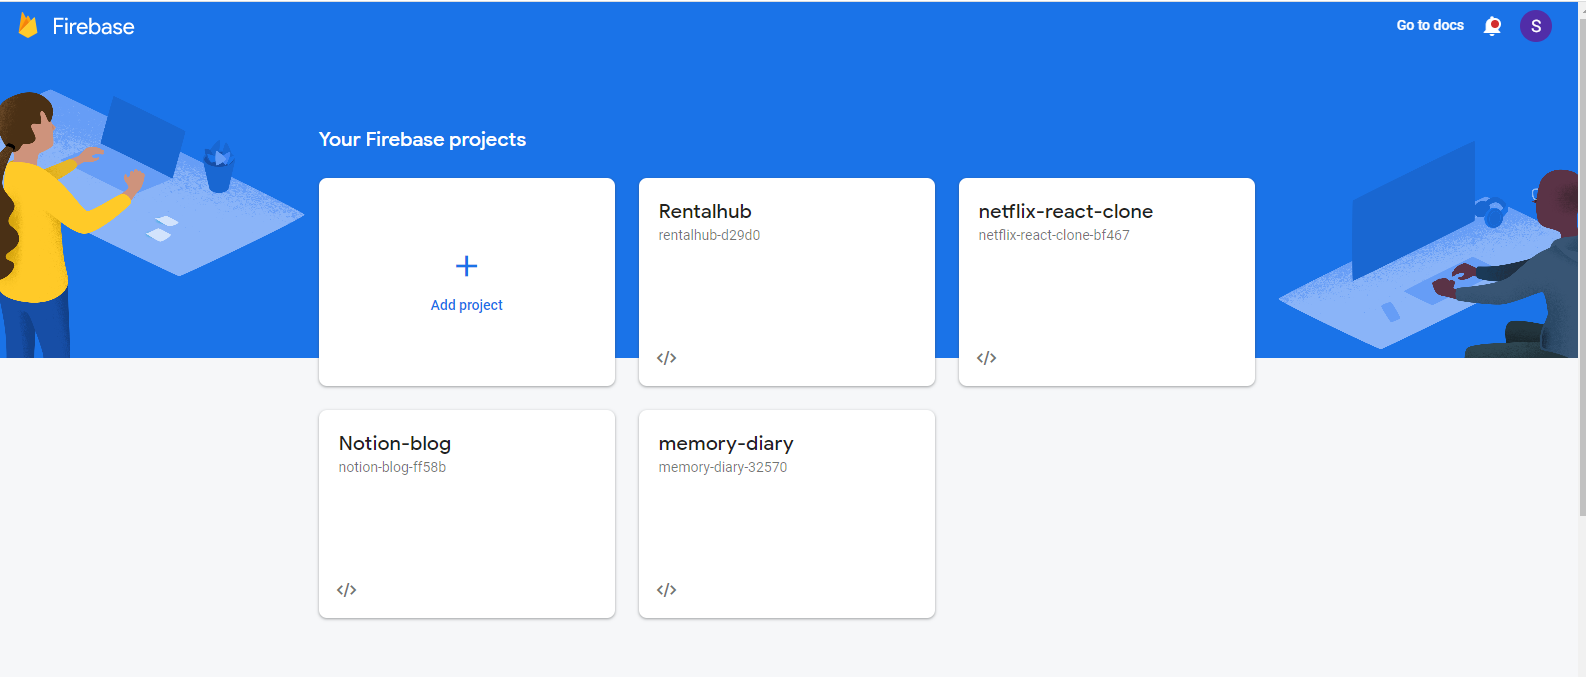
Firebase user home display
I already have some projects I created using firebase, but in your case, you should just see the add project box.
Creating a project is simple, you can just click on the plus (+) icon and just follow the instructions and create your own project. But since you’re reading this I will be taking you on a step-by-step guide.
When you click on the plus icon, an interface like the picture below would be open where you would be prompted to create a project name, for this tutorial we will call our project Formik-app
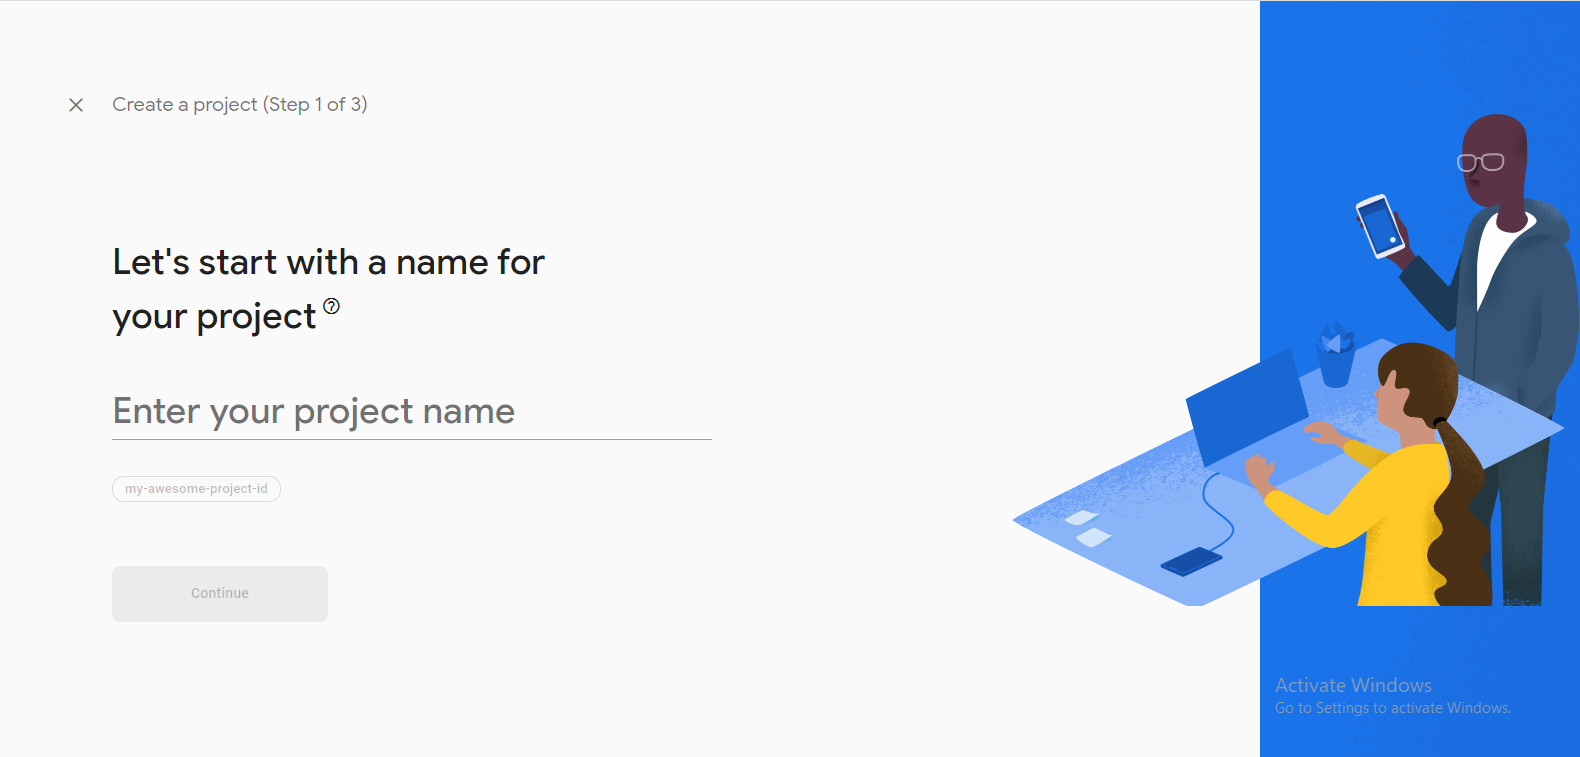
firebase project name interface
After typing in your project name, click on continue. After clicking on continue you would be redirected to another page for google analytics which in this project we won’t be needing, so you can go ahead and disable it.
Your screen should look like mine below after you have disabled it
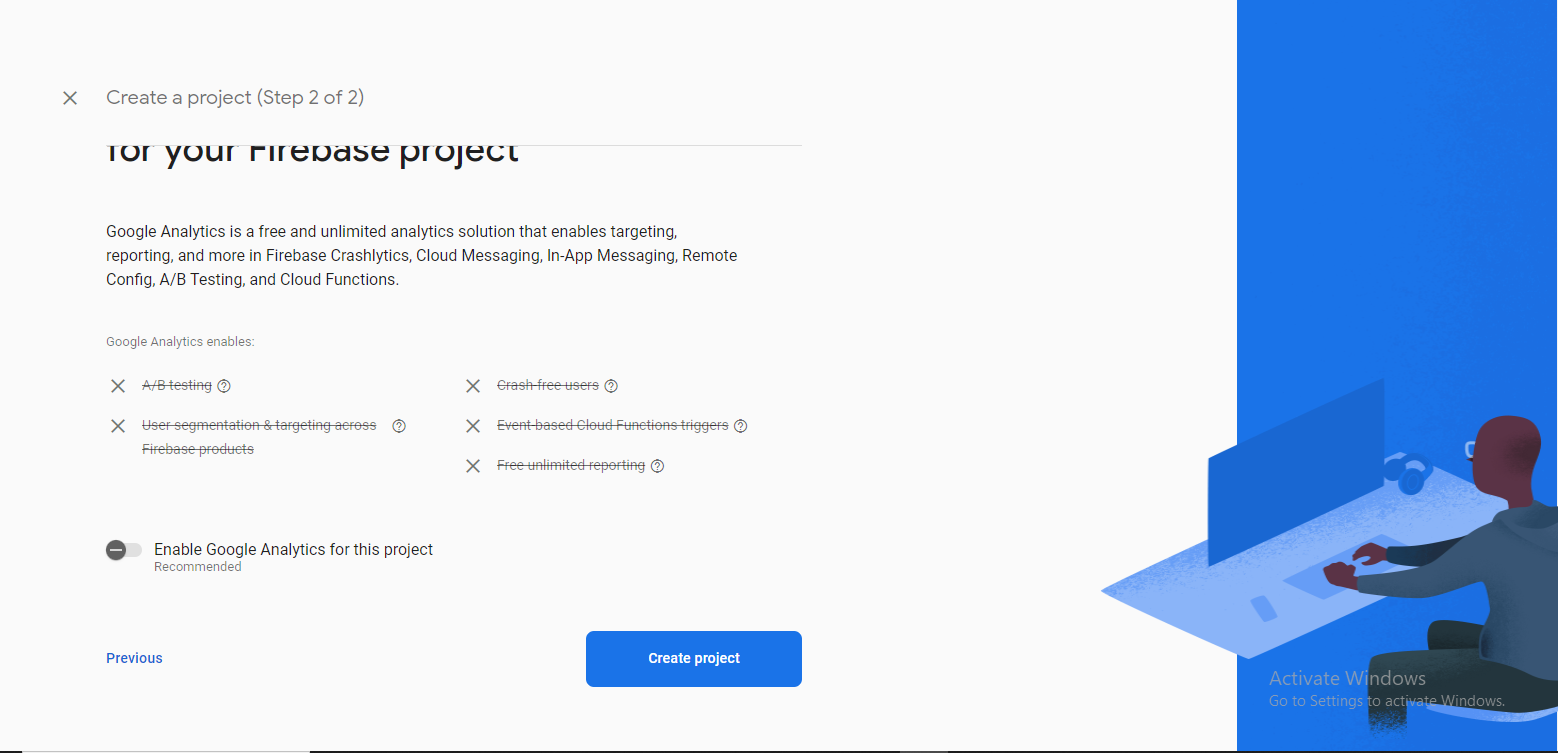
Firebase google analytics page
If your screen is the same as mine, then you can click on the Create project button to create your project, this will take a few minutes to create and after it, you will see a page as shown below with text saying your new project is ready.

project ready page
Congratulation, you have successfully created your project. You can go ahead to click on the continue button, which will take you to the firebase console where you can add firebase to your project.
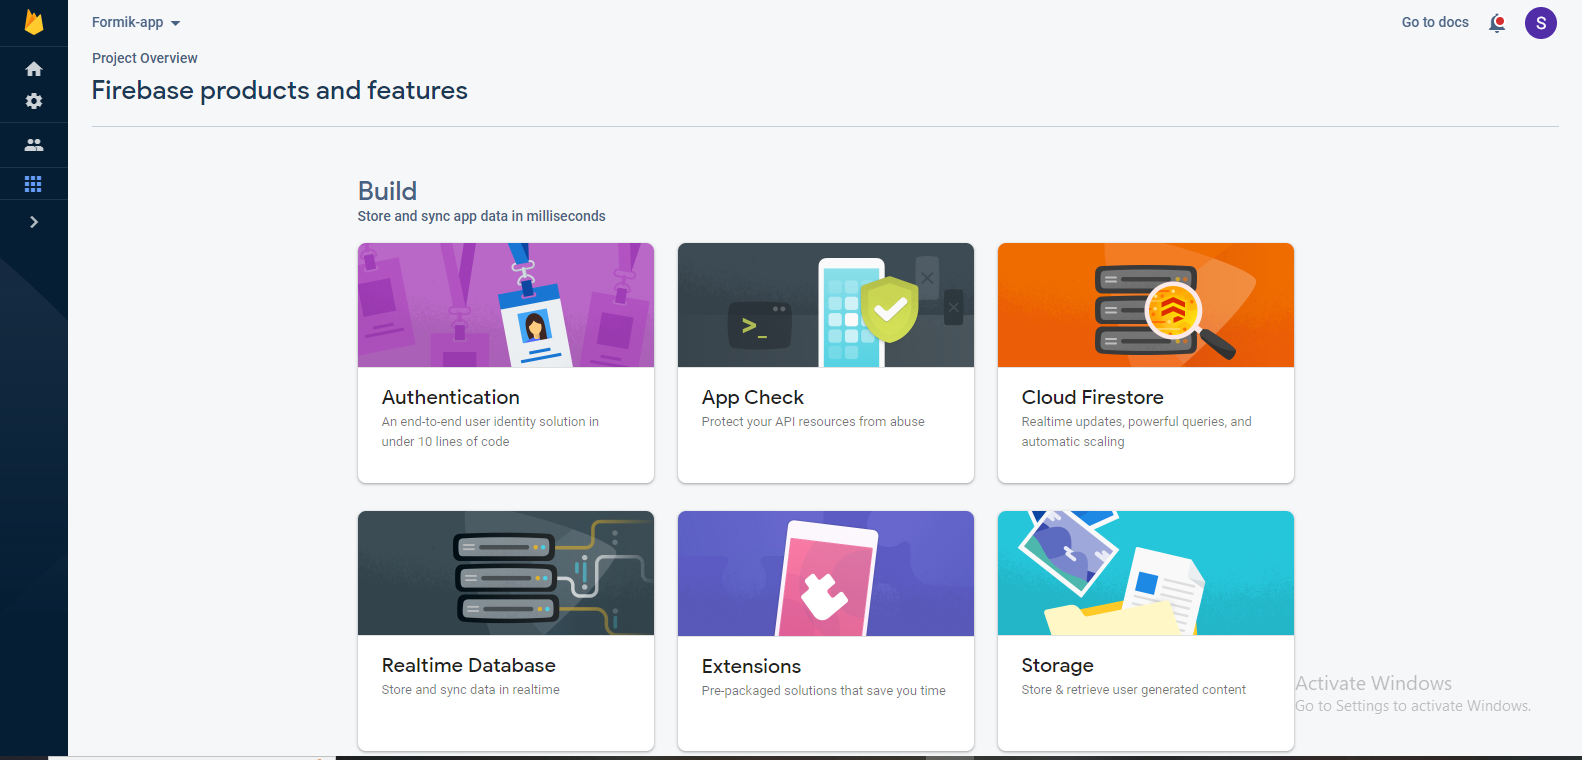
Below is what your firebase console for your project should look like:

firebase console
To use firebase with our React app we will need to add firebase to our app. Firebase supports IOS, Android, and web applications. In our case we are building a web application, so we are going to choose the web application icon which is the third icon below the “Get started by adding Firebase to your app ” text.
Clicking on the icon will take you to another page where you will register your app. A picture of what the page looks like is shown below

We are required to input a nickname for our app. We will use the same we used when creating the project Formik-app.
Firebase gives us an opportunity to set up hosting for our app on the fly but we won’t be setting up hosting so we won’t tick the hosting option.
After typing in the nickname for your app, you can go ahead and click on the register app button.
With that out of the way, we would be redirected to a page where we would get the code to use for initializing our firebase in order to be able to use firebase SDK in our React app.

This is the point where we would stop to create our React app, and after creating it, we would come back and copy the code and paste it into our firebase.js file, which we would create after creating our React app.
You will need to copy your own configuration code and not your own when it’s time to copy the code.
Creating a React App
Using any code editor of your choice, I will be using VsCode. Open the terminal on your code editor and run the following command to start your React project
npx create-react-app formik-appNavigate to the folder and start the application using the following command
npm startCleaning up our React app
The react app comes with some files which we won’t be needing in this project so let’s clean it up and leave just the files we would be needing and create any new files that we might need along the way
How to Set Up and Configure Firebase SDK
To configure firebase SDK we will have to install firebase in our React app. To install firebase run the command on your terminal. Make sure you have nodejs instal
npm install firebaseAfter installing firebase let’s create a file called firebase.js, we will create this file inside of our SRC folder, it’s in this file that we will initialize firebase SDK.
After creating the firebase.js file, go back to your firebase and copy the configuration SDK code and paste it inside the firebase.js file.
// Import the functions you need from the SDKs you need
import { initializeApp } from "firebase/app";
// TODO: Add SDKs for Firebase products that you want to use
// https://firebase.google.com/docs/web/setup#available-libraries

// Your web app's Firebase configuration
const firebaseConfig = {
  apiKey: "AIzaSyCDDFeCkXHgfVKrc-sWX2L8ZwE-m9rAP9k",
  authDomain: "formik-app-89715.firebaseapp.com",
  projectId: "formik-app-89715",
  storageBucket: "formik-app-89715.appspot.com",
  messagingSenderId: "523963018807",
  appId: "1:523963018807:web:36fbfc61ea6b8eab0d19b2"
};

// Initialize Firebase
const app = initializeApp(firebaseConfig);
Congratulations! You have successfully initialized Firebase. With that out of the way, we can start using the Firebase SDK.
We can go ahead and import the products we want to use. We are going to be using the getAuth which we will get by destructuring it from the firebase/auth and importing it into our firebase.js file.
import { getAuth } from "firebase/auth";copy the above code and paste it inside the firebase.js file right below where we imported the initializeApp. After you have imported the getAuth, your firebase.js file should have the following code as shown below:
// Import the functions you need from the SDKs you need
import { initializeApp } from "firebase/app";
import { getAuth } from "firebase/auth";
// TODO: Add SDKs for Firebase products that you want to use
// https://firebase.google.com/docs/web/setup#available-libraries

// Your web app's Firebase configuration
const firebaseConfig = {
  apiKey: "AIzaSyCDDFeCkXHgfVKrc-sWX2L8ZwE-m9rAP9k",
  authDomain: "formik-app-89715.firebaseapp.com",
  projectId: "formik-app-89715",
  storageBucket: "formik-app-89715.appspot.com",
  messagingSenderId: "523963018807",
  appId: "1:523963018807:web:36fbfc61ea6b8eab0d19b2"
};

// Initialize Firebase
const app = initializeApp(firebaseConfig);

// Initialize Firebase Authentication and get a reference to the service
export const auth = getAuth(app);
export default app;
With that out of the way, let’s go back to our firebase console to set up an authentication method.
Like we stated earlier firebase provides us with a lot of ways to authenticate users. For this tutorial, we will go with using email addresses and passwords for authenticating users.
To start using the Firebase SDK Authentication, select the Authentication SDK among the Build categories. check the image below
After clicking on the authentication you will be directed to a page where you will enable the authentication method you want to use for your project. below is what the page looks like:
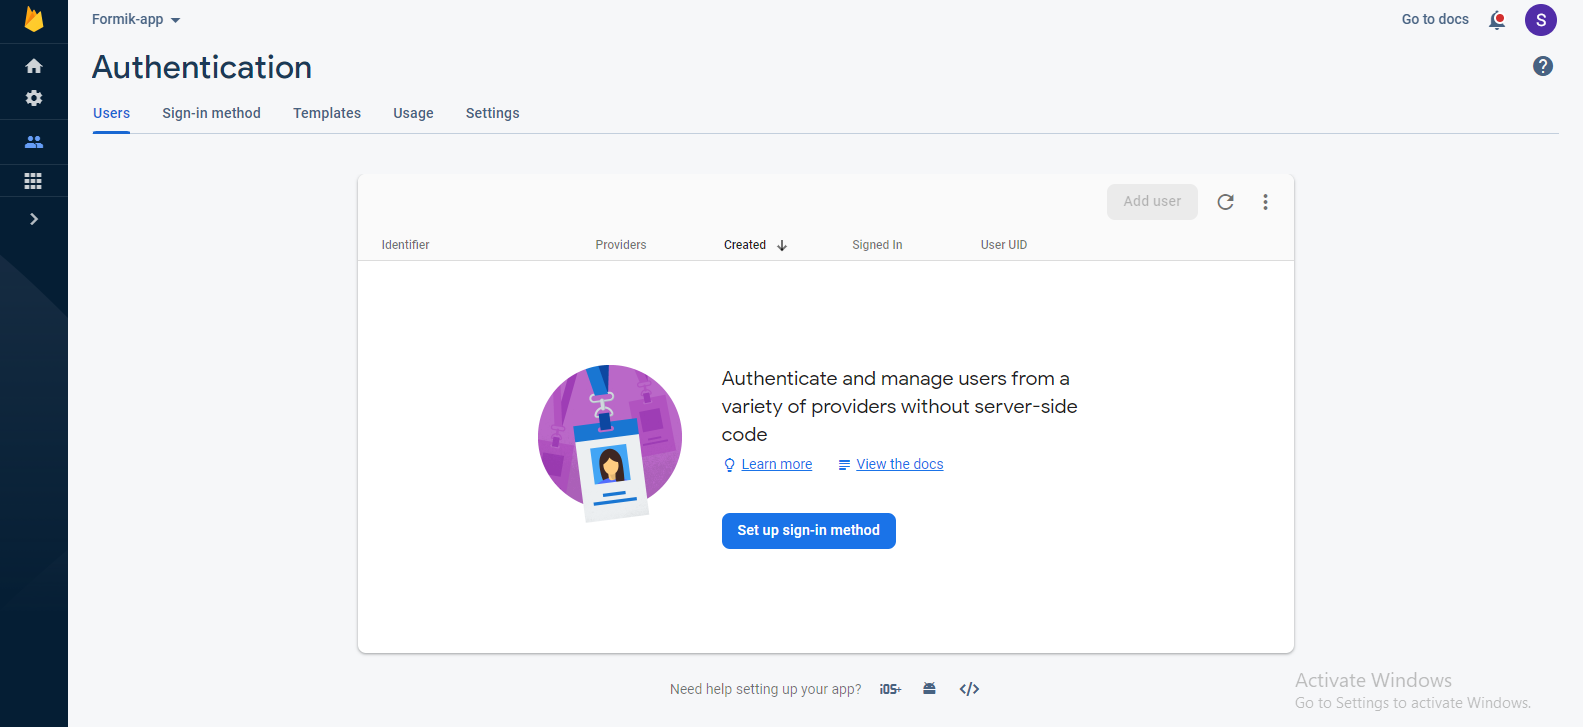
From this page click on the Sign in method as we stated earlier we would be using only email and password for this project so we are going to enable just the email/password.
Below is what the page looks like

To enable the email/password authentication, click on the button with email/password on it and you will be taken to the page where you will enable it.
After enabling it to click on the save button, and that’s it, you have successfully enabled authentication with email and password for the application.
Creating Sign In, Sign Up, and Profile Page
To authenticate users we will need pages with form inputs where users can input their credentials like email and password. So we are going to create three pages for Sign In, Sign Up a user, and a Profile page to redirect a user after successful signUp.
let’s create a folder called pages inside of the SRC folder, it’s inside this pages folder that we will be creating the different pages.
So go ahead and create the individual page inside of our pages folder and create a react functional component for each of the page files.
To be able to navigate to these different pages on our application we need to create routes for each page.
React provides us with a way to create routes by using what is known as react-router-dom, but first, we will have to install the react-router-dom package.
So go ahead and open up your terminal and run the following command:
npm install react-router-domAfter installing the react-router-dom package, we have to set up our application to use it. You can check my other article on how to set up react-router-dom.
but to continue copy and paste the code below into your app.js file.
import React from 'react';
import Profile from './page/Profile';
import Signup from './page/Signup';
import SignIn from './page/SignIn';
import LogOut from './page/LogOut';
import { BrowserRouter as Router} from 'react-router-dom';
import {Routes, Route} from 'react-router-dom';

function App() {

  return (
    <Router>
      <div>
        <section>
            <Routes>                                                                        <Route path="/" element={<Home/>}/>
               <Route path="/sign-up" element={<Signup/>}/>
               <Route path="/sign-in" element={<SignIn/>}/>
                <Route path="/log-out" element={<LogOut/>}/>
                <Route path="/profile" element={<Profile/>}/>
            </Routes>
        </section>
      </div>
    </Router>
  );
}

export default App;
From the code above we imported the different pages which we have created. We also imported Router, Routes, and Route which are coming from the react-router-dom package we just installed, and used them in creating route paths for our different pages.
Now we can successfully navigate to the different pages on our website.
Creating Form inputs for our SignUp page
Copy the code and paste the code below into the signUp page
import React,from 'react';
import {Link} from 'react-router-dom'

const Signup = () => {

  return (
    <main >
        <section>
            <div>
                <div>
                    <h1> FormikApp </h1>
                    <form>
                        <div>
                            <label htmlFor="email-address">
                                Email address
                            </label>
                            <input
                                type="email"
                                label="Email address"
                                value={email}
                                onChange={(e) => setEmail(e.target.value)}
                                required
                                placeholder="Email address"
                            />
                        </div>

                        <div>
                            <label htmlFor="password">
                                Password
                            </label>
                            <input
                                type="password"
                                label="Create password"
                                value={password}
                                onChange={(e) => setPassword(e.target.value)}
                                required
                                placeholder="Password"
                            />
                        </div>

                        <button
                            type="submit"
                            onClick={onSubmit}
                        >
                            Sign up
                        </button>

                    </form>

                    <p>
                        Already have an account?{' '}
                        <Link to="/sign-in" >
                            Sign in
                        </Link>
                    </p>
                </div>
            </div>
        </section>
    </main>
  )
}

export default Signup
Creating Form inputs for our Sign In page
copy and paste the following code inside of your SignIn page
import React from 'react';
import {Link, useNavigate } from 'react-router-dom'

const SignIn = () => {

    return(
        <>
            <main >
                <section>
                    <div>
                        <p> FocusApp </p>

                        <form>
                            <div>
                                <label htmlFor="email-address">
                                    Email address
                                </label>
                                <input
                                    id="email-address"
                                    name="email"
                                    type="email"
                                    required
                                    placeholder="Email address"
                                    onChange={(e)=>setEmail(e.target.value)}
                                />
                            </div>

                            <div>
                                <label htmlFor="password">
                                    Password
                                </label>
                                <input
                                    id="password"
                                    name="password"
                                    type="password"
                                    required
                                    placeholder="Password"
                                    onChange={(e)=>setPassword(e.target.value)}
                                />
                            </div>

                            <div>
                                <button
                                    onClick={onLogin}
                                >
                                    Login
                                </button>
                            </div>
                        </form>

                        <p className="text-sm text-white text-center">
                            No account yet? {' '}
                            <Link to="/sign-up">
                                Sign up
                            </Link>
                        </p>

                    </div>
                </section>
            </main>
        </>
    )
}

export default SignIn
Creating a Layout for the Profile page
import React from 'react';


const Home = () => {


    const handleLogout = () => {


    return(
        <>
            <nav>
                <p>
                    Welcome To your Profile page
                </p>

                <div>
           <button>
                        Logout
                    </button>
          </div>
            </nav>
        </>
    )
}

export default Home;
Now that we have implemented the basic UI of our formik app let’s start adding authentication to each of the pages.
How To Sign Up a User
To Sign Up a user, we created a form that allows new users to register with our app using their email address and a password. When the user completes the form, a validation of the email address and password provided by the user takes place before passing them to the createUserWithEmailAndPassword method which we get from the firebase auth.
below is the full code for authenticating a new user on our signUp page, copy and replace the code in your signUp page with the code below.
import React,from 'react';
import {useState} from 'react'
import {Link, useNavigate} from 'react-router-dom'
import { getAuth, createUserWithEmailAndPassword } from "firebase/auth";

const Signup = () => {

const navigate = useNavigate()

//creating a formData state to hold each state for email and password
 const [formData, setFormData] = useState({
    email: "",
    password: "",
  });

//Destructuring email and password from formData
  const {email, password } = formData;

//Declaring the onChange function
 function onChange(e) {
    setFormData((prevState) => ({
      ...prevState,
      [e.target.id]: e.target.value,
    }));
  }

//Declaring the onSubmit function
 async function onSubmit(e) {
    e.preventDefault();
    try {
      const auth = getAuth();
      const userCredential = await createUserWithEmailAndPassword(
        auth,
        email,
        password
      );

      const user = userCredential.user;
      navigate("/");


    } catch (error) {
     const errorCode = error.code;
    const errorMessage = error.message;
    }
  }

  return (
    <main >
        <section>
            <div>
                <div>
                    <h1> FormikApp </h1>
                    <form onSubmit={onSubmit}>
                        <div>
                            <label htmlFor="email-address">
                                Email address
                            </label>
                            <input
                                type="email"
                                id="email"
                                label="Email address"
                                value={email}
                                onChange={onChange}
                                required
                                placeholder="Email address"
                            />
                        </div>

                        <div>
                            <label htmlFor="password">
                                Password
                            </label>
                            <input
                                type="password"
                                id="password"
                                label="Create password"
                                value={password}
                                onChange={onChange}
                                required
                                placeholder="Password"
                            />
                        </div>

                        <button
                            type="submit"

                        >
                            Sign up
                        </button>

                    </form>

                    <p>
                        Already have an account?{' '}
                        <Link to="/sign-in" >
                            Sign in
                        </Link>
                    </p>
                </div>
            </div>
        </section>
    </main>
  )
}

export default Signup
Code Breakdown:
From line 2, we imported the useState hook from react, which we used to declare our state on line 8.
On line 3, we imported the Link and useNavigate from react-router-dom for navigating to the different pages.
On line 4, we imported the {getAuth, createUserWithEmailAndPassword} from “firebase/auth”, which we used to authenticate and store the user’s credential.
On line 6, we declared a variable called navigate and assigned the useNavigate function to it
On line 8, we declared our formData state using the useState hook and passed an object holding the initial states for the email and password which in this case is an empty string.
On line 13, we destructured the email and password from the formData.
On line 15, we declared the onChange function and inside the function, we update the state of the formData by calling the setFormData function inside the setFormData function we declared an arrow function which accepts the prevState and in the return statement, we returned the previous of the input typed by the user by spreading the prevState, and then setting the value from the input to the exact input whose id matches the id that the user is currently typing on.
for example, if the user is currently typing in the email input, then [e.target.id] will be equal to [email], so therefore the value typed by the user will be stored inside the email. that’s the same for the password too.
That’s it for the signUp page. Let’s work on the Sign In page.
Sign In Existing User
To sign in to an existing user we have created a form that allows existing users to sign in using their email address and password. When a user completes the form, then the signInWithEmailAndPassword method is called:
below is the full code for signing In a new user on our signIn page, copy and replace the code in your signIn page with the code.
import React from 'react';
import {Link, useNavigate } from 'react-router-dom'
import { signInWithEmailAndPassword, getAuth } from "firebase/auth";

const SignIn = () => {

const navigate = useNavigate();

const [formData, setFormData] = useState({
    email: "",
    password: "",
  });

  const { email, password } = formData;

  function onChange(e) {
    setFormData((prevState) => ({
      ...prevState,
      [e.target.id]: e.target.value,
    }));
  }
  async function onSubmit(e) {
    e.preventDefault();
    try {
      const auth = getAuth();
      const userCredential = await signInWithEmailAndPassword(
        auth,
        email,
        password
      );
      if (userCredential.user) {
        navigate("/profile");
      }
    } catch (error) {
      const errorCode = error.code;
    const errorMessage = error.message;
    }
  }

    return(
        <>
            <main >
                <section>
                    <div>
                        <p> FocusApp </p>

                        <form onSubmit={onSubmit}>
                            <div>
                                <label htmlFor="email-address">
                                    Email address
                                </label>
                                <input
                                    id="email"
                                    name="email"
                                    type="email"
                                    required
                                    placeholder="Email address"
                                    onChange={onChange}
                                />
                            </div>

                            <div>
                                <label htmlFor="password">
                                    Password
                                </label>
                                <input
                                    id="password"
                                    name="password"
                                    type="password"
                                    required
                                    placeholder="Password"
                                    onChange={onChange}
                                />
                            </div>

                            <div>
                                <button type="submit"

                                >
                                   Sign In
                                </button>
                            </div>
                        </form>

                        <p className="text-sm text-white text-center">
                            No account yet? {' '}
                            <Link to="/sign-up">
                                Sign up
                            </Link>
                        </p>

                    </div>
                </section>
            </main>
        </>
    )
}

export default SignIn
Everything is the same as the SignUp page, except that this time with used the signInWithEmailAndPassword method.
How to LogOut a User
After successfully signing Up and Signing In, a user is redirected to the profile page, in some other projects the user can be redirected to the home page. On the profile page, we created a button for logging out a user.
so copy and replace the code in your profile page with the code below
import React from 'react';


const Home = () => {
    function onLogout() {
    auth.signOut();
    navigate("/sign-in");
  }

    const handleLogout = () => {


    return(
        <>
            <nav>
                <p>
                    Welcome To your Profile page
                </p>

                <div>
           <button onClick={onLogout}>
                        Logout
                    </button>
          </div>
            </nav>
        </>
    )
}

export default Home;
For logging out is pretty simple, we created a logout function and called the signOut method which is coming from firebase/auth. On the logout button, we called the onClick event handler and passed the onLogout function.
When the button is clicked we want the user to be redirected to the sign In page.
Conclusion
In this article, we took a step-by-step guide approach to how to authenticate users in our React app using firebase authentication.
We learned how to authenticate users using their email and password and also learned that there are other ways in which we can authenticate users like google which firebase also support.
We also learned how to create routes for react applications using the react-router-dom package.
I hope you can build projects which require authenticating users just by following this article.
Feel free to check the firebase documentation to learn more about all the amazing features firebase provides.


