The principle that guides the Mastering Backend community is simple: You can only ever really make progress by building real-world applications which help to solve real-world problems. If you’re looking to build an impressive portfolio, it is crucial that you do not underestimate any APIs that are well-built. A mistake a lot of new backend devs make when building portfolio projects is pressure themselves into building spectacular projects that either become too complicated to finish alone, or don’t address real-world pain points. I would advise that you repeat a mantra and sing it to yourself as you begin this project – Keep it Simple, Stupid. Simple is best, because it allows you address several issues actual users may face and gives your logic sufficient room for expansion without overcomplicating things.
That said, while the project you’ll build here may not address every problem a user would face, it introduces key practices such as documentation and authentication that would help improve your craft in backend development. You’ll be taken on a step by step guide on how to build a personal library API using Node.js, Express and MongoDB.
Prerequisites
These are some important concepts and tools you should be familiar with to build this project:
JavaScript Fundamentals
Node.js
Express.js
MongoDB + CRUD operations (Create, read, update, delete)
JSON Web Tokens (JWT)
Familiarity with Swagger UI - To document your code and run your endpoints in the beautiful UI
Building the API
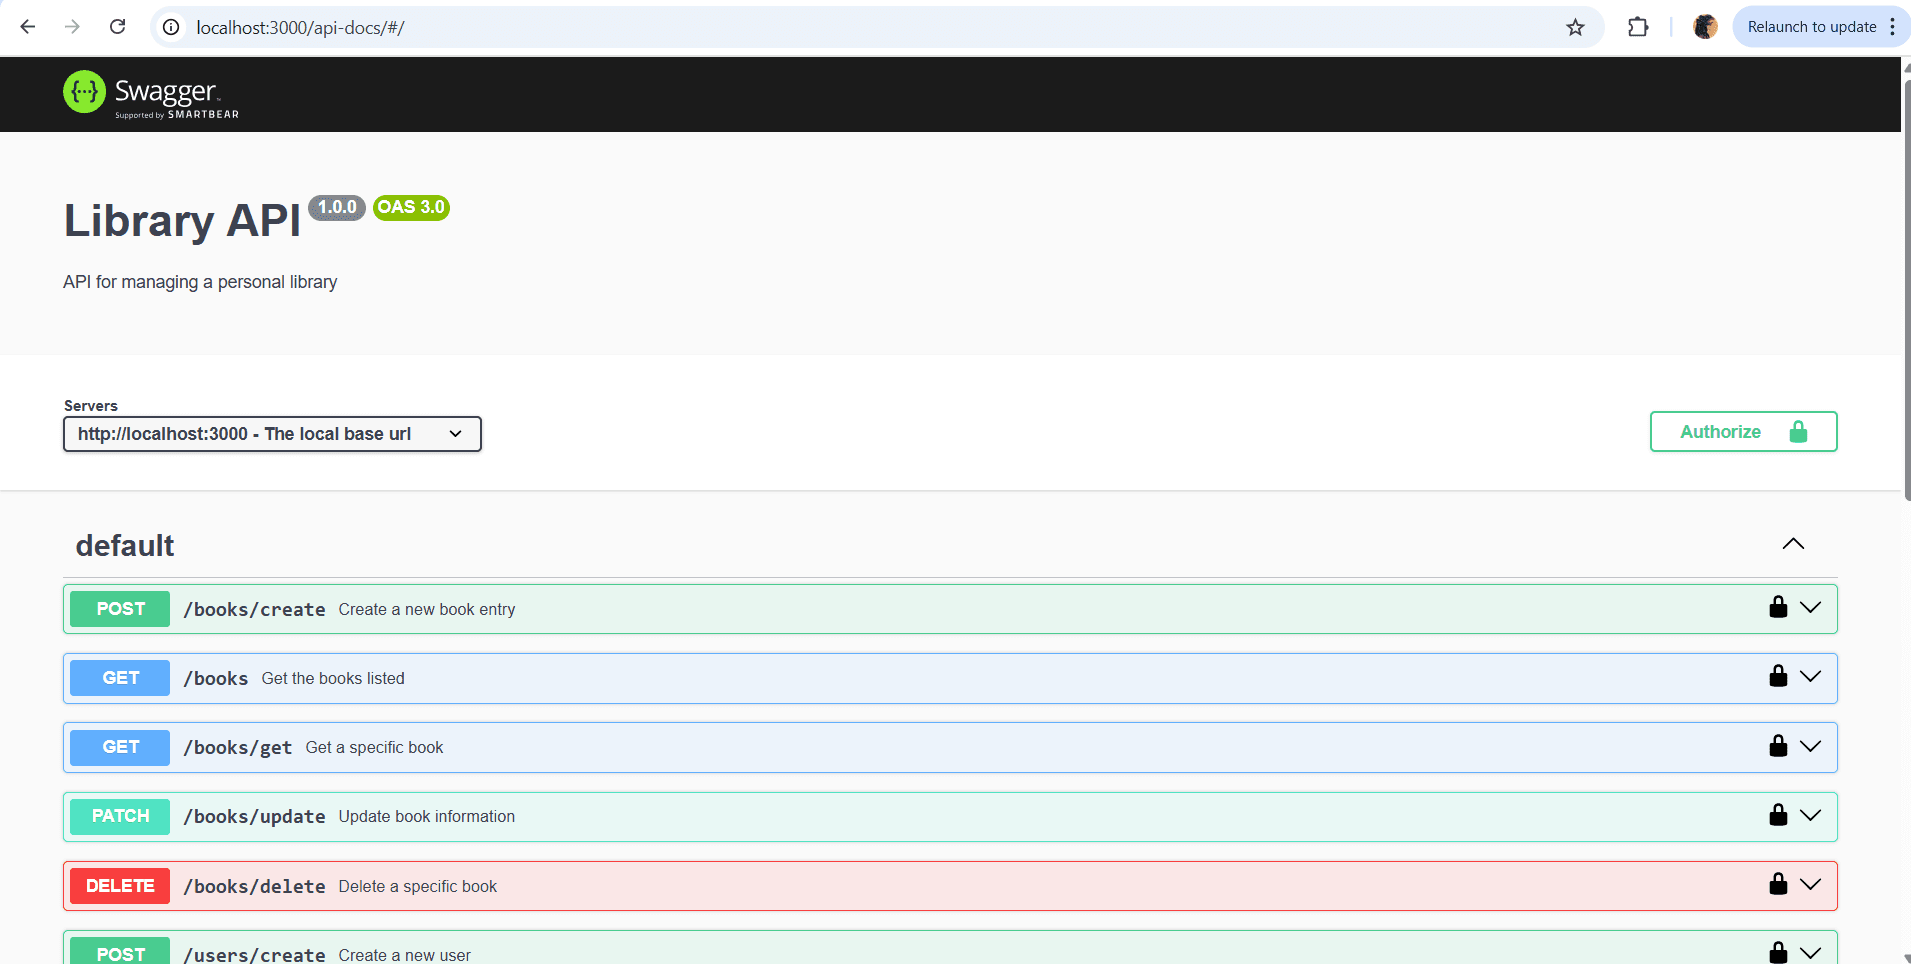
The server serves - no pun intended - to ensure that client requests are handled, database interactions are carried out seamlessly and business logic is processed. Here, you’ll build your very own backend logic. At the end of this tutorial, you’ll have a Swagger Docs page just like the one below. Just follow along with the steps.
Step 1: Initialize the Node Project
At this step, while in the root directory, you’ll initialize the node project by typing the following in the terminal. This would start the project and provide you with a package.json file with scripts you’d run:
npm initIf you’d rather stick with the defaults, run:
npm init -yOnce that’s done, you open your terminal and install the needed packages in dev dependencies:
npm install --save-dev nodemonThen install the following:
npm install express mongoose bcrypt jsonwebtoken dotenvIn your package.json, add the following line to the scripts object so that you can run your program in dev mode. nodemon allows your program to restart automatically after you make any changes to your code and save.
"dev": "nodemon server.js"After this, create a file named .env and add the following:
PORT = 3000PORT indicates the particular port your server would be listening in on. After creating the .env file, be sure to create a file named .gitignore so that you don’t push files like node_modules and .env into a git repository. It should look like this:
.env
node_modules/
With this, you have successfully initialized your project, and can continue building your backend.
Step 2: Build the Server
Create a file named server.js. In it, add the following code:
require('dotenv').config()
const express = require('express')
const app = express()
const port = process.env.PORT
app.use(express.json())
app.get('/', (req, res) => {
res.send("This awesome Library API is running!")
})
app.listen(port, () => {
console.log(`Server is listening on port ${port}`)
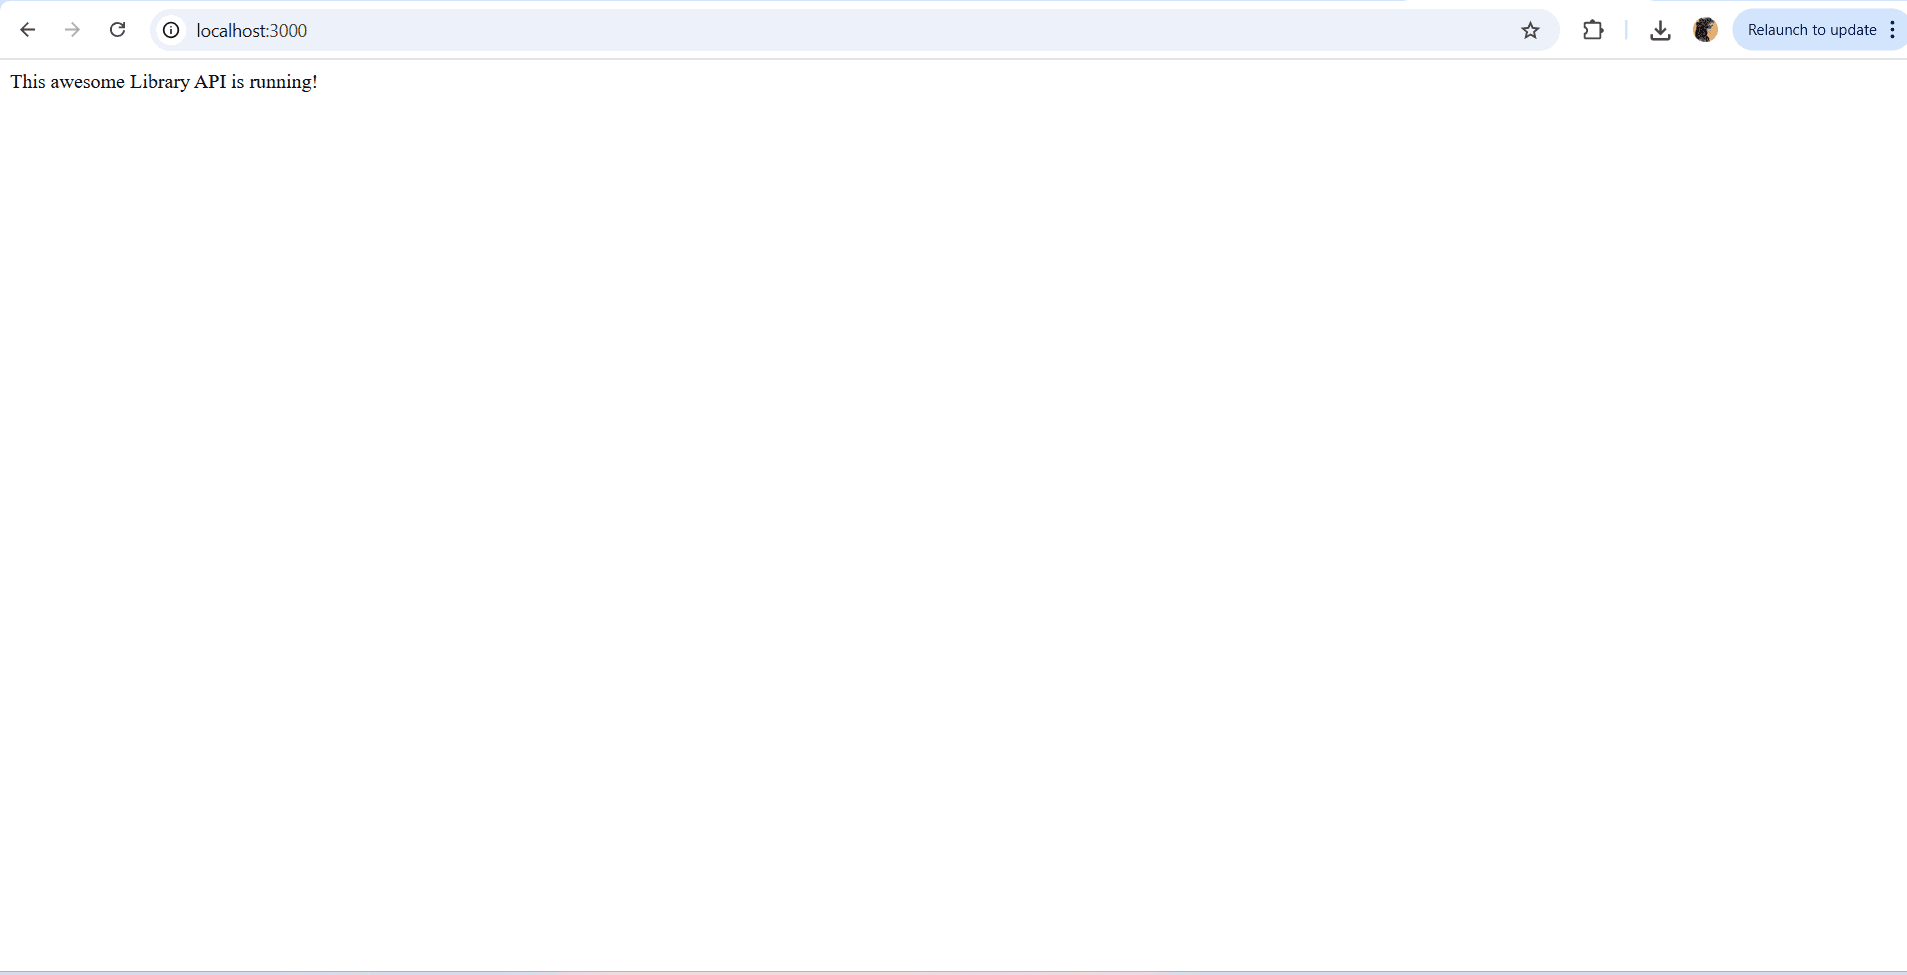
})This is where the server is setup; it listens on the port set in .env. app.use(express.json()) ensures that JSON objects are recognized. If ignored, errors occur when sending requests. Now you can run the server using the script we created for it earlier in package.json:
npm run devYou’ll see the screen below when you run http://localhost:3000
Step 3: Setup the Database
Ensure you have mongodb installed in your computer. If not, follow these instructions and create a database. Create a new file named db.js. This is where your database configuration will be located:
require('dotenv').config()
const mongoose = require('mongoose')

const connectDB = async () => {
    try{
        await mongoose.connect(process.env.DB_URI)
        console.log("Database connected successfully")
    } catch(err){
        console.log(` A Database connection error occured: ${err.message}`)
    }
}

module.exports = connectDB
Next, you update your .env file to include the database connection URI, as well as server.js to run the connectDB() function. Note that mydb is used in the DB_URI but it should be the name of your database. Both files should now be:
.env:
PORT = 3000
DB_URI = mongodb://127.0.0.1:27017/mydb
server.js:
require('dotenv').config()
const express = require('express')
const connectDB = require('./db')
const app = express()
const port = process.env.PORT

app.use(express.json())

connectDB()

app.get('/', (req, res) => {
    res.send("This awesome Library API is running!")
})

app.listen(port, () => {
    console.log(`Server is listening on port ${port}`)
})
Step 4: Create the Model Directory and Files
At this point, you have to decide what the core aspects of the project would be. Since you’re building a library API, you may decide you’ll want some sort of authentication and possibly authorization for your app, to restrict who could use it. You’ll also need to handle the actual library endpoints for dealing with things like adding books, reading them, updating information on them and deleting them (CRUD operations).
You could start by creating models and repositories. Models typically hold data definitions for your API. For a library app, we may want to store the name of the book, the date it was added, the book’s URL , some information on or summary of the book and information on the reader who added the book. For authentication, you’d need information like name, email and password. This entails that you’ll create two model files, one for user information, and another for library operations. Typically, you would create a user.model.js file in the models directory with the following:
const mongoose = require('mongoose')

const userSchema = new mongoose.Schema({
    name: {
        type: String,
        required: [true, "Name is required"],
        trim: true
    },
    email: {
        type: String,
        required: [true, "Email is required"],
        trim: true,
        unique: true,
        lowercase: true
    },
    password: {
        type: String,
        required: [true, "Password is required"],
    },
},
{timestamps: true}
)

module.exports = mongoose.model("User", userSchema)
Create another file in the same directory called books.model.js and add the following:
const mongoose = require('mongoose')

const booksSchema = new mongoose.Schema({
    bookName: {
        type: String,
        required: [true, "Book name is required"],
        trim: true
    },
    authorName: {
        type: String,
        required: [true, "Author name is required"],
        trim: true
    },
    bookSummary: {
        type: String,
        required: [true, "Book summary is required"]
    },
    bookURL: {
        type: String,
        required: [false, "Book url is optional"]
    },
    readerId: {
        type: mongoose.Schema.Types.ObjectId,
        ref: "User",
        required: false,
        trim: true
    },
    readerName: {
        type: String,
        ref: "User",
        required: false,
        trim: true
    },
},
{timestamps: true}
)

module.exports = mongoose.model("Books", booksSchema)
In the above, you’ll notice that the readerId field has a type of mongoose.Schema.Types.ObjectId. This is to connect both the User and Books schemas, so that the user’s id is stored and their name extracted into readerName when they create a book entry.
Step 5: Create the Repository Directory and Files
Here you’ll create a directory named repository. Similar to the model directory, in it create two files: user.repository.js and books.repository.js accordingly. The repository files are your direct link to the database, meaning that you run your queries that interact with the database here. In the user.repository.js, paste this code:
const User = require('../models/user.model')
const bcrypt = require('bcrypt')

const create = async(userData) => {
    const user = User(userData)
    const hashedPassword = await bcrypt.hash(user.password, 10)
    user.password = hashedPassword
    return user.save()
}

const findById = async(id) => {
    return User.findById(id)
}

const findByEmail = async(email) => {
    return User.findOne({email})
}

const updateData = async(id, updateData) => {
    return User.findByIdAndUpdate(id, updateData, {new: true})
}

const deleteData = async(id) => {
    return User.findByIdAndDelete(id)
}

module.exports = {
    create,
    findById,
    findByEmail,
    updateData,
    deleteData
}
Likewise, in books.repository.js add the following code:
const Books = require('../models/books.model')

const create = async(bookData) => {
    const book = Books(bookData)
    return book.save()
}

const find = async() => {
    return Books.find()
}

const findById = async(id) => {
    return Books.findById(id)
}

const findByEmail = async(email) => {
    return Books.findOne({email})
}

const updateData = async(id, updateData) => {
    return Books.findByIdAndUpdate(id, updateData, {new: true})
}

const deleteData = async(id) => {
    return Books.findByIdAndDelete(id)
}

module.exports = {
    create,
    find,
    findById,
    findByEmail,
    updateData,
    deleteData
}
In the update function for both repositories, notice the {new: true}. This tells your code to return the updated data after making the update. Next, you’ll explore the service layer of the server.
Step 6: Create the Service Directory and Service Files
At this point, you’re probably noticing a pattern and can tell that you’ll be creating two files in the services directory you create, one named user.service.js and another named books.service.js. In user.service.js, place the following code:
const mongoose = require('mongoose')
const userRepo = require('../repositories/user.repository')
const bcrypt = require('bcrypt')
const jwt = require('jsonwebtoken')

const createUser = async(userData) => {
    try{
        const existingUser = await userRepo.findByEmail(userData.email)
        if(!existingUser){
        const newUser = await userRepo.create(userData)
        return newUser
        } else{
        throw new Error("User already exists. Kindly login.")
        }
    } catch(err){
        throw err
    }
}

const loginUser = async(loginData) => {
    try {
        const existingUser = await userRepo.findByEmail(loginData.email)
        const validPassword = await bcrypt.compare(loginData.password, existingUser.password)

        if(existingUser && validPassword){
            const authToken = jwt.sign(
            { id: existingUser._id, email: existingUser.email },
            process.env.JWT_SECRET,
            { expiresIn: "1h" },
    );
            return {existingUser, authToken}
        }
        else{
            throw new Error("Invalid login credentials.")
        }
    } catch (err) {
        throw err
    }
}

const getUser = async(userId) => {
    try {
         if (!mongoose.Types.ObjectId.isValid(userId)) {
                    throw new Error("Invalid user ID.")
                }
        const user = await userRepo.findById(userId)

        if(userId){
            return user
        }
        else{
            throw new Error("You are not authorized to view this data")
        }
    } catch (err) {
        throw err
    }
}


const updateUser = async(userId, updateData) => {
    try {
         if (!mongoose.Types.ObjectId.isValid(userId)) {
            throw new Error("Invalid user ID.")
        }
        const newUpdate = await userRepo.updateData(userId, updateData)
        return newUpdate

    } catch (err) {
        throw err

    }
}

const deleteUser = async(userId) => {
    try {
         if (!mongoose.Types.ObjectId.isValid(userId)) {
            throw new Error("Invalid user ID.")
        }
        await userRepo.deleteData(userId)

    } catch (err) {
        throw err

    }
}

module.exports = {
    createUser,
    loginUser,
    getUser,
    updateUser,
    deleteUser
}
In the login function, you’ll notice that using JSON web tokens, you’ll successfully create an authorization token, allowing you control access to protected routes. Be sure to add a new variable to your .env file like the one below:
JWT_SECRET = UUM1gR1npVMkkGB09jbb5Cd4PdgDjAYnezbpRoomzrAckYeZMmKg9pxEpdtUgT5wX51JepYou’ll then create a books.service.js with the following data:
const mongoose = require('mongoose')
const booksRepo = require('../repositories/books.repository')
const userRepo = require('../repositories/user.repository')

const createBook = async(bookData, userId) => {
    try{
        const newBook = await booksRepo.create(bookData)
        newBook.readerId = userId
        const reader = await userRepo.findById(userId)
        newBook.readerName = reader.name
        return newBook

    } catch(err){
        throw err
    }
}

const getBooks = async() => {
    try {
        const books = await booksRepo.find()
        return books

    } catch (err) {
        throw err
    }
}

const getBook = async(id) => {
    try {
        if (!mongoose.Types.ObjectId.isValid(id)) {
            throw new Error("Invalid book ID.")
        }
        const existingBook = await booksRepo.findById(id)
        if(existingBook){
            return existingBook
        }
        else{
            throw new Error("Book not found.")
        }
    } catch (err) {
        throw err
    }
}


const updateBook = async(bookId, updateData) => {
    try {
         if (!mongoose.Types.ObjectId.isValid(bookId)) {
            throw new Error("Invalid book ID.")
        }
        const newUpdate = await booksRepo.updateData(bookId, updateData)
        return newUpdate

    } catch (err) {
        throw err

    }
}

const deleteBook = async(bookId) => {
    try {
         if (!mongoose.Types.ObjectId.isValid(bookId)) {
            throw new Error("Invalid book ID.")
        }
        await booksRepo.deleteData(bookId)

    } catch (err) {
        throw err

    }
}


module.exports = {
    createBook,
    getBooks,
    getBook,
    updateBook,
    deleteBook
}
The above is a CRUD showing creating a book entry, reading information on the selected book, updating and deleting a book.
At this point in the project, you probably can’t help but observe a subtle inelegance of our code. We seem to repeatedly handle errors in the tutorial. This is an eye sore for warriors of the DRY (do not repeat yourself) principle. However, it is not an oversight but a way to make the concepts clearer even if it means a repetition or two. In future tutorials, we’ll explore practical error handling management and proper validation in depth but for now, this would suffice.
With the completion of the above, you’re finished with the service layer and would be moving on the controller layer of your API.
Step 7: Create the Controller Directory and Controller Files
The controller layer is responsible for handling the response and HTTP request logic. It calls on the service layer. Following the same pattern, two files would be created in the controllers directory: user.controller.js and books.controller.js. In the user.controller.js file, add the following code:
const userService = require('../services/user.service')

const createUser = async(req, res) => {
    try {
        const newUser = await userService.createUser(req.body)
        res.status(201).json({message: "User created successfully", data: newUser})

    } catch (err) {
        res.status(500).json({error: err.message})

    }
}
const loginUser = async(req, res) => {
    try {
        const user = await userService.loginUser(req.body)
        res.status(200).json({message: "User logged in successfully", data: user})

    } catch (err) {
        res.status(500).json({error: err.message})

    }
}

const getUser = async(req, res) => {
    try {
        const userId = req.user.id
        const user = await userService.getUser(req.body, userId)
        res.status(200).json({message: "User retrieved successfully", data: user})

    } catch (err) {
        res.status(500).json({error: err.message})

    }
}

const updateUser = async(req, res) => {
    try {
        const userId = req.user.id
        const user = await userService.updateUser(userId, req.body)
        res.status(200).json({message: "User updated successfully", data: user})

    } catch (err) {
        res.status(500).json({error: err.message})

    }
}

const deleteUser = async(req, res) => {
    try {
        const userId = req.user.id
        await userService.deleteUser(userId)
        res.status(200).json({message: "User deleted successfully"})

    } catch (err) {
        res.status(500).json({error: err.message})

    }
}

module.exports = {
    createUser,
    loginUser,
    getUser,
    updateUser,
    deleteUser
}
In books.controller.js, be sure to copy and paste this:
const booksService = require('../services/books.service')

const createBook = async(req, res) => {
    try {
        const newBook = await booksService.createBook(req.body)
        res.status(201).json({message: "Book added successfully", data: newBook})

    } catch (err) {
        res.status(500).json({error: err.message})

    }
}

const getBooks = async(req, res) => {
    try {
        const books = await booksService.getBooks()
        res.status(200).json({message: "Books retrieved successfully", data: books})

    } catch (err) {
        res.status(500).json({error: err.message})

    }
}

const getBook = async(req, res) => {
    try {
        const bookId = req.query.id
        const book = await booksService.getBook(id)
        res.status(200).json({message: "Book retrieved successfully", data: book})

    } catch (err) {
        res.status(500).json({error: err.message})

    }
}

const updateBook = async(req, res) => {
    try {
        const bookId = req.query.id
        const book = await booksService.updateBook(bookId, req.body)
        res.status(200).json({message: "Book updated successfully", data: book})

    } catch (err) {
        res.status(500).json({error: err.message})

    }
}

const deleteBook = async(req, res) => {
    try {
        const bookId = req.query.id
        await booksService.deleteBook(bookId)
        res.status(200).json({message: "Book deleted successfully"})

    } catch (err) {
        res.status(500).json({error: err.message})

    }
}

module.exports = {
    createBook,
    getBooks,
    getBook,
    updateBook,
    deleteBook
}
Notice that we call the ids by using a query. This implies that the endpoint will have a form similar to https://myLibraryAppLink?id=bookId. This is different from calling the ids via a parameter which would have the form: https://myLibraryAppLink/bookId/
Notice also that in user.controller.js, in order to get a user, we obtain that user’s id via req.user.id Where does this come from? This is obtained using a middleware which in this context is a special function that sits between incoming HTTP requests and the route handler. You’ll learn what that is after the next step.
Step 8: Create the Routes Directory and Files
Now we have the controllers setup but what URLS would the users visit to get a response? We’ll need to define routes that connect each URL to their respective controllers. In your root directory as usual, create a directory named routes and within it, two files. The first named user.routes.js. In this, add the following code:
const express = require('express')
const router = express.Router()
const userController = require('../controllers/user.controller')

router.post('/create', userController.createUser)
router.post('/login', userController.loginUser)
router.get('/get', userController.getUser)
router.patch('/update', userController.updateUser)
router.delete('/delete', userController.deleteUser)

module.exports = router
In the second named books.routes.js:
const express = require('express')
const router = express.Router()
const booksController = require('../controllers/books.controller')


router.post('/create', booksController.createBook)
router.get('/', booksController.getBooks)
router.get('/get', booksController.getBook)
router.patch('/update', booksController.updateBook)
router.delete('/delete', booksController.deleteBook)

module.exports = router
Now that you have this, you’ll need to update your server.js to include these routes and assign clear base paths (like /users for user routes) so your server knows how to handle the endpoints correctly:
require('dotenv').config()
const express = require('express')
const connectDB = require('./db')
const app = express()
const port = process.env.PORT
const userRoutes = require('./routes/user.routes')
const booksRoutes = require('./routes/books.routes')

app.use(express.json())

connectDB()

app.use('/users', userRoutes)
app.use('/books', booksRoutes)

app.get('/', (req, res) => {
    res.send("This awesome Library API is running!")
})

app.listen(port, () => {
    console.log(`Server is listening on port ${port}`)
})
Now, if running on localhost and on port 3000 for example, your create users route would become: http://localhost:3000/users/create
Step 9: Create an Authorization Middleware
The purpose of this step is to create an authorization middleware to allow only authorized users access your library API. Create a directory named middleware and within it, a file named auth.middleware.js. Add this code:
const jwt = require("jsonwebtoken");

const authMiddleware = (req, res, next) => {
  const authHeader = req.headers.authorization;

  if (!authHeader || !authHeader.startsWith("Bearer ")) {
    return res.status(401).json({ error: "Unauthorized. Token not provided." });
  }

  const authToken = authHeader.split(" ")[1];

  try {
    const decoded = jwt.verify(authToken, process.env.JWT_SECRET);
    req.user = decoded;
    next();
  } catch (err) {
    res.status(401).json({ error: "Invalid or expired token" });
  }
};

module.exports = {
  authMiddleware
};
Now that this is done, recall I mentioned that middleware sit between incoming HTTP requests and the route handler. This means we will modify the route files to include the middleware for endpoints that need to be protected from unauthorized, prying eyes. Update user.routes.js to look like this:
const express = require('express')
const router = express.Router()
const userController = require('../controllers/user.controller')
const { authMiddleware } = require('../middleware/auth.middleware')

router.post('/create', userController.createUser)
router.post('/login', userController.loginUser)
router.get('/get', authMiddleware, userController.getUser)
router.patch('/update', authMiddleware, userController.updateUser)
router.delete('/delete', authMiddleware, userController.deleteUser)

module.exports = router
Likewise, for the books routes:
const express = require('express')
const router = express.Router()
const booksController = require('../controllers/books.controller')
const { authMiddleware } = require('../middleware/auth.middleware')

router.post('/create', authMiddleware, booksController.createBook)
router.get('/', authMiddleware, booksController.getBooks)
router.get('/get', authMiddleware, booksController.getBook)
router.patch('/update', authMiddleware, booksController.updateBook)
router.delete('/delete', authMiddleware, booksController.deleteBook)

module.exports = router
Notice how the login and create users routes were left. This is because you won’t want to restrict those, since new users have no token yet, and the token is only generated on login.
Step 10: Create a SwaggerDocs UI To View and Test Endpoints
Not a lot of developers are keen on documentation, but it is a crucial aspect of backend development. Imagine I gave you some piece of complicated tech and then just left you alone grappling with it, offering no help or assistance. That’s how it feels to leave your code undocumented. Documentation makes for good practice in your career as a backend developer.
There are a number of ways to document APIs including using Postman, Insomnia and Redoc. However, for the purpose of this tutorial we would be using OpenAPI’s Swagger. To begin, type the following in your terminal, in the root directory where you’ve got package.json to install the needed packages:
npm install swagger-jsdoc swagger-ui-express If you peep into package,json, you’ll find them listed. Now, create a file called swagger.js and add this code:
const swaggerJsdoc = require('swagger-jsdoc');
const swaggerUi = require('swagger-ui-express')
const path = require('path')

const options = {
    definition: {
        openapi: "3.0.0",
        info: {
            title: "Library API",
            version: "1.0.0",
            description: "API for managing a personal library",
        },
        components: {
            securitySchemes: {
                bearerAuth: {
                    type: "http",
                    scheme: "bearer",
                    bearerFormat: "JWT"
                }
            }
        },
        security: [
            {
                bearerAuth: []
            }
        ],
        servers: [

            {
                url: "http://localhost:3000",
                description: "The local base url"
            }
        ],
    },
    apis: [path.join(__dirname, "./routes/*.js")]
}

const swaggerSpec = swaggerJsdoc(options);

const setupSwagger = (app) => {
    app.use("/api-docs", swaggerUi.serve, swaggerUi.setup(swaggerSpec));
};

module.exports = setupSwagger;
At the risk of sounding like a broken record with repeatedly asking you to modify your route files, go into the user.routes.js file and update the code so it looks like the following:
const express = require('express')
const router = express.Router()
const userController = require('../controllers/user.controller')
const { authMiddleware } = require('../middleware/auth.middleware')

/**
 * @swagger
 * components:
 *   schemas:
 *     User:
 *       type: object
 *       required:
 *         - name
 *         - email
 *         - password
 *       properties:
 *         name:
 *           type: string
 *         email:
 *           type: string
 *           format: email
 *         password:
 *           type: string
 *           format: password
 *       example:
 *         name: "John"
 *         email: "[email protected]"
 *         password: "strongPassword123"
 *
 *     UpdateUser:
 *       type: object
 *       properties:
 *         name:
 *           type: string
 *           example: "John"
 *       description: Allowed fields for updating a user.
 *
 *     Login:
 *       type: object
 *       required:
 *         - email
 *         - password
 *       properties:
 *         email:
 *           type: string
 *           format: email
 *         password:
 *           type: string
 *           format: password
 *       example:
 *         email: "[email protected]"
 *         password: "strongPassword123"
 */

/**
 * @swagger
 * /users/create:
 *   post:
 *     summary: Create a new user
 *     requestBody:
 *       required: true
 *       content:
 *         application/json:
 *           schema:
 *             $ref: '#/components/schemas/User'
 *     responses:
 *       201:
 *         description: User registered successfully
 *       400:
 *         description: Invalid input
 */
router.post('/create', userController.createUser)

/**
 * @swagger
 * /users/login:
 *   post:
 *     summary: User login
 *     requestBody:
 *       required: true
 *       content:
 *         application/json:
 *           schema:
 *             $ref: '#/components/schemas/Login'
 *     responses:
 *       200:
 *         description: Login successful
 *       400:
 *         description: Invalid credentials
 */
router.post('/login', userController.loginUser)

/**
 * @swagger
 * /users:
 *   get:
 *     summary: Get user
 *     security:
 *       - bearerAuth: []
 *     parameters:
 *       - name: id
 *         in: query
 *         schema:
 *           type: string
 *     responses:
 *       200:
 *         description: User retrieved successfully
 */
router.get('/get', authMiddleware, userController.getUser)

/**
 * @swagger
 * /users/update:
 *   patch:
 *     summary: Update user information
 *     security:
 *       - bearerAuth: []
 *     requestBody:
 *       required: true
 *       content:
 *         application/json:
 *           schema:
 *             $ref: '#/components/schemas/UpdateUser'
 *     parameters:
 *       - name: id
 *         in: query
 *         schema:
 *           type: string
 *     responses:
 *       200:
 *         description: User updated successfully
 *       400:
 *         description: Invalid input
 */
router.patch('/update', authMiddleware, userController.updateUser)

/**
 * @swagger
 * /users:
 *   delete:
 *     summary: Update user information
 *     security:
 *       - bearerAuth: []
 *     parameters:
 *       - name: id
 *         in: query
 *         schema:
 *           type: string
 *     responses:
 *       200:
 *         description: User deleted successfully
 *       400:
 *         description: Invalid input
 */
router.delete('/delete', authMiddleware, userController.deleteUser)

module.exports = router
These changes are important, so that Swagger can build the documentation. Likewise, in books.routes.js:
const express = require('express')
const router = express.Router()
const booksController = require('../controllers/books.controller')
const { authMiddleware } = require('../middleware/auth.middleware')

/**
 * @swagger
 * components:
 *   schemas:
 *     Books:
 *       type: object
 *       required:
 *         - bookName
 *         - authorName
 *         - bookSummary
 *         - bookURL
 *         - dateAdded
 *         - nameOfReader
 *       properties:
 *         bookName:
 *           type: string
 *         authorName:
 *           type: string
 *         bookSummary:
 *           type: string
 *         bookURL:
 *           type: string
 *         dateAdded:
 *           type: string
 *           format: date
 *         nameOfReader:
 *           type: object
 *           properties:
 *             _id:
 *               type: string
 *             name:
 *               type: string
 *       example:
 *         bookName: "The Chronicles of Narnia"
 *         authorName: "C.S. Lewis"
 *         bookSummary: "Siblings are evacuated from London during World War II and find a portal to a magical land."
 *         bookURL: "https://linktobook.com"
 *         dateAdded: "2025-09-15"
 *         nameOfReader:
 *           _id: "650fa8d9f1c2b4a39c8d1234"
 *           name: "John"
 *
 *     UpdateBook:
 *       type: object
 *       properties:
 *         bookName:
 *           type: string
 *         bookSummary:
 *           type: string
 *         bookURL:
 *           type: string
 *       example:
 *         bookSummary: "Siblings find a portal to a magical land."
 *         bookURL: "https://link1tobook.com"
 */

/**
 * @swagger
 * /books/create:
 *   post:
 *     summary: Create a new book entry
 *     security:
 *       - bearerAuth: []
 *     requestBody:
 *       required: true
 *       content:
 *         application/json:
 *           schema:
 *             $ref: '#/components/schemas/Books'
 *     responses:
 *       201:
 *         description: Book entry created successfully
 *       400:
 *         description: Invalid input
 */
router.post('/create', authMiddleware, booksController.createBook)

/**
 * @swagger
 * /books:
 *   get:
 *     summary: Get the books listed
 *     security:
 *       - bearerAuth: []
 *     responses:
 *       200:
 *         description: Books retrieved successfully
 *       400:
 *         description: Invalid input
 */
router.get('/', authMiddleware, booksController.getBooks)

/**
 * @swagger
 * /books/get:
 *   get:
 *     summary: Get a specific book
 *     security:
 *       - bearerAuth: []
 *     parameters:
 *       - name: id
 *         in: query
 *         schema:
 *           type: string
 *     responses:
 *       200:
 *         description: Book retrieved successfully
 *       400:
 *         description: Invalid input
 */
router.get('/get', authMiddleware, booksController.getBook)

/**
 * @swagger
 * /books/update:
 *   patch:
 *     summary: Update book information
 *     security:
 *       - bearerAuth: []
 *     requestBody:
 *       required: true
 *       content:
 *         application/json:
 *           schema:
 *             $ref: '#/components/schemas/UpdateBook'
 *     parameters:
 *       - name: id
 *         in: query
 *         schema:
 *           type: string
 *     responses:
 *       200:
 *         description: Book updated successfully
 *       400:
 *         description: Invalid input
 */
router.patch('/update', authMiddleware, booksController.updateBook)

/**
 * @swagger
 * /books/delete:
 *   delete:
 *     summary: Delete a specific book
 *     security:
 *       - bearerAuth: []
 *     parameters:
 *       - name: id
 *         in: query
 *         schema:
 *           type: string
 *     responses:
 *       200:
 *         description: Book deleted successfully
 *       400:
 *         description: Invalid input
 */
router.delete('/delete', authMiddleware, booksController.deleteBook)

module.exports = router
In server.js, be sure to add the following lines:
const setupSwagger = require("./swagger");
setupSwagger(app)
With this, swagger UI would gift your API with clear documentation that you can test your endpoints on and allow others to test. Go to http://localhost:3000/api-docs to view it when running your server locally.
You may have noticed a very important piece missing from our project: automated tests. While we just interacted with the API through Swagger UI to see the endpoints work, this is a manual way to accomplish this task.
Ideally, your API should also include automated tests that programmatically verify your endpoints are working as expected. Some popular testing tools for Node.js exist such as Jest, Mocha and Chai. We won’t be covering automated testing in this tutorial, but we’ll dedicate a future guide to it.
Step 11: Celebrate. You Survived.
That was quite a journey and quite a lot to unpack. Remember to take your time as you don’t have to get it all in a sitting.
You should be proud. You created a working server, documented your endpoints and even included authentication. Now that you’re done, go ahead and test your API by typing the following in the root directory to run it locally:
npm run devTest out each endpoint in Swagger UI and note what happens. Show it to friends. Seriously. Consider it a start to even more wonderful backend projects to come. I encourage you to check out the API on GitHub as well as look up other amazing projects you could build.