Working with Node.js to create APIs is a broad topic because it covers building scalable APIs and designing enterprise-level APIs in Node.js. We will cover API and API Design for these backend engineering resources.
However, we will learn how to build a simple web API using the Node http module and introduce you to popular Node frameworks you can use to build scalable APIs for your project.
In the previous lesson, we learned about the http module and how you can use it to create a web server. Here we will build a simple API to demonstrate how to use the http module to build APIs without any framework.
Setting up Your Development Environment
Create a project directory for your new Node.js project and cd into the directory using the commands below:
mkdir node-todo-api
cd node-todo-api
Next, initialize a default package.json file to install and manage our dependencies and run our Node project.
npm init -y
This command will create a new package.json file inside your root directory. Open it and update it to look like the one below:
{
  "name": "tests",
  "version": "1.0.0",
  "description": "",
  "main": "server.js",
  "scripts": {
    "test": "echo \\"Error: no test specified\\" && exit 1",
		"start": "node server.js"
  },
  "keywords": [],
  "author": "",
  "license": "ISC"
}
The API will perform a basic CRUD (Create, Read, Update, and Delete) operation on an array of todos since want to keep things very basic and not configure any database.
The last part of the setup is using the http module from Node to create a web server for our API. We have already done something similar above, but let’s review it again.
const http = require('http)
const server = http.createServer((req, res) => {});

server.listen(3000, () => {
	console.log('Server is running')
});
The code snippet above creates a simple HTTP server using the createServer method of the http module from Node.js, and next, we listen to incoming requests on port 3000.
Create a Temporary Array of Todos
Next, we will create an array of todos that serve as our database to perform the CRUD operations on it. With this array, we should be able to create new todo, read todo from the array, update the todo state, and delete the todo when done.
So add the following code to your server.js file to create the array:
// Data Source, could be replaced with a real database
const todos = [
  {
    title: "Todo 1",
    desc: "This is my first Todo",
    completed: true,
  },

  {
    title: "Todo 2",
    desc: "This is my second Todo",
    completed: true,
  },

  {
    title: "Todo 3",
    desc: "This is my third Todo",
    completed: true,
  },

  {
    title: "Todo 4",
    desc: "This is my fourth Todo",
    completed: true,
  },

  {
    title: "Todo 5",
    desc: "This is my fifth Todo",
    completed: true,
  },
];
To clear confusion, the final code should look like this inside the server.js file:
const http = require('http)
const server = http.createServer((req, res) => {

	// Router will be added here

});

// Data Source, could be replaced with a real database
const todos = [
  {
    title: "Todo 1",
    desc: "This is my first Todo",
    completed: true,
  },

  {
    title: "Todo 2",
    desc: "This is my second Todo",
    completed: true,
  },

  {
    title: "Todo 3",
    desc: "This is my third Todo",
    completed: true,
  },

  {
    title: "Todo 4",
    desc: "This is my fourth Todo",
    completed: true,
  },

  {
    title: "Todo 5",
    desc: "This is my fifth Todo",
    completed: true,
  },
];

server.listen(3000, () => {
	console.log('Server is running')
});
Creating Routes
Next, we will create routes on our server to retrieve, create, update, and delete todos from our temporary database. Create a new routes.js file inside your root directory and add the following code snippet.
touch routes.js
Open the routes.js file and add the following code snippet before you move on to adding the other codes explained below:
const router = async function (req, res) {

	// Add other codes here

};
module.exports = router;
Get Routes
We will start by creating the GET routes, which we will use to retrieve all todos or a specific todo with the ID:
// GET: /api/todos
if (req.url === "/api/todos" && req.method === "GET") {

    // set the status code and content-type
    res.writeHead(200, { "Content-Type": "application/json" });

    // get all todos and send data
    res.end(JSON.stringify(todos));
}
The code snippet above retrieves all the todos from our temporary storage using the find() method when the request URL equals /api/todos and the request method is GET using the req object.
Lastly, we return the status code of 200 and the content type of application/json and the todos data using res.writeHead and res.end, respectively.
Next, we will retrieve a single todo based on the URL and the ID of the URL that’s provided. Take a look at the code snippet below:
// GET: /api/todos/:id
if (req.url.match(/\\\\/api\\\\/todos\\\\/([0-9]+)/) && req.method === "GET") {
    try {
        // extract id from url
        const id = req.url.split("/")[3];

        // get todo from DB
        const todo = await todos.find((todo) => todo.id === id) };

        if (todo) {
            res.writeHead(200, { "Content-Type": "application/json" });
            res.end(JSON.stringify(todo));
        } else {
            throw new Error("Todo does not exist");
        }
    } catch (error) {
        res.writeHead(404, { "Content-Type": "application/json" });
        res.end(JSON.stringify({ message: error }));
    }
}
The code snippet above checks if the request URL matches our regex expression (that’s if it matched /api/todos/:id, where :id equals any number) and it's a GET then we will find the todo using the id and return it as a response, or we return not found exception.
POST Routes
The code snippet below implements the POST request to create new todos in our temporary database. Take a look at the code implementation below:
// POST: /api/todos/
if (req.url === "/api/todos" && req.method === "POST") {
    try {
        let body = "";

        // Listen for data event
        req.on("data", (chunk) => {
            body += chunk.toString();
        });

        // Listen for the end event
        req.on("end", async () => {
            // Create a new todo
            await todos.push(JSON.parse(body));
            res.writeHead(200, { "Content-Type": "application/json" });
            res.end(todos.slice(-1));
        });
    } catch (error) {
        console.log(error);
    }
}
The code snippet above checks if the URL is equal to /api/todos and if the request method is POST. Then we add the data to our temporary database without proper validation.
The request object req implements the Node.js ReadableStream interface. The stream emits a data and end event, giving us access to the data from the request body. Next, we listen to the data event and convert the data to a string by concatenating it to the body variable above. In the end event, we push the body to our array after parsing using JSON.parse function.
Lastly, we return the last added item in our array using the todos.slice method.
PUT Routes
Next, we will look at implementing the PUT request in Node.js. Take a look at this code snippet below for the implementation:
// PUT: /api/todos/:id
if (req.url.match(/\\\\/api\\\\/todos\\\\/([0-9]+)/) && req.method === "PUT") {
    try {
        // extract id from url
        const id = req.url.split("/")[3];
        let body = "";

        req.on("data", (chunk) => {
            body += chunk.toString();
        });

        req.on("end", async () => {
            // Find and update document
            const todo = todos.find((todo) => todo.id === id);

	    if(!todo) throw new Error("Todo does not exist");

	    // Not the best approach to update arrays :)
	    todos[todo] = JSON.parse(body);

            res.writeHead(200, { "Content-Type": "application/json" });
            res.end(JSON.stringify(todo));
        });
    } catch (error) {
        console.log(error);
    }
}
The code snippet above checks if the URL matches our regular expression and if it’s a PUT request. Then we move to update the todo in our temporary database that matches the specified ID with the new data.
Finally, we returned the updated data as a response. However, if any error is encountered, we throw new errors.
DELETE Route
Lastly, we will look at implementing the DELETE request in Node.js. Take a look at this code snippet below for the implementation:
// DELETE: /api/todos/:id
if (req.url.match(/\\\\/api\\\\/todos\\\\/([0-9]+)/) && req.method === "DELETE") {
    try {
        const id = req.url.split("/")[3];

       // Delete todo from DB

	const todoIndex = todos.findIndex((todo) => (todo.id = id));
	if(!todoIndex) throw new Error("Todo does not exist");

        todos.splice(todoIndex, 1);

        res.writeHead(200, { "Content-Type": "application/json" });
        res.end(JSON.stringify({ message: "Todo deleted successfully" }));

    } catch (error) {
        res.writeHead(404, { "Content-Type": "application/json" });
        res.end(JSON.stringify({ message: error }));
    }
}
This code block extracts the id from the url, deletes the todo with the matching id, sends the status code and headers, and closes the request.
Import the Router
Finally, import router.js in your server.js file and call your router function, passing req and res arguments as shown below:
const router = require("./routes.js");

const server = http.createServer((req, res) => {
    router(req, res);
});
Below is the full implementation of the server.js file. You can also visit my repository to view the complete routes.js file:
const http = require('http)
const router = require("./routes.js");

const server = http.createServer((req, res) => {

 // Router will be added here
 router(req, res);

});

// Data Source, could be replaced with a real database
const todos = [
  {
    title: "Todo 1",
    desc: "This is my first Todo",
    completed: true,
  },

  {
    title: "Todo 2",
    desc: "This is my second Todo",
    completed: true,
  },

  {
    title: "Todo 3",
    desc: "This is my third Todo",
    completed: true,
  },

  {
    title: "Todo 4",
    desc: "This is my fourth Todo",
    completed: true,
  },

  {
    title: "Todo 5",
    desc: "This is my fifth Todo",
    completed: true,
  },
];

server.listen(3000, () => {
	console.log('Server is running')
});
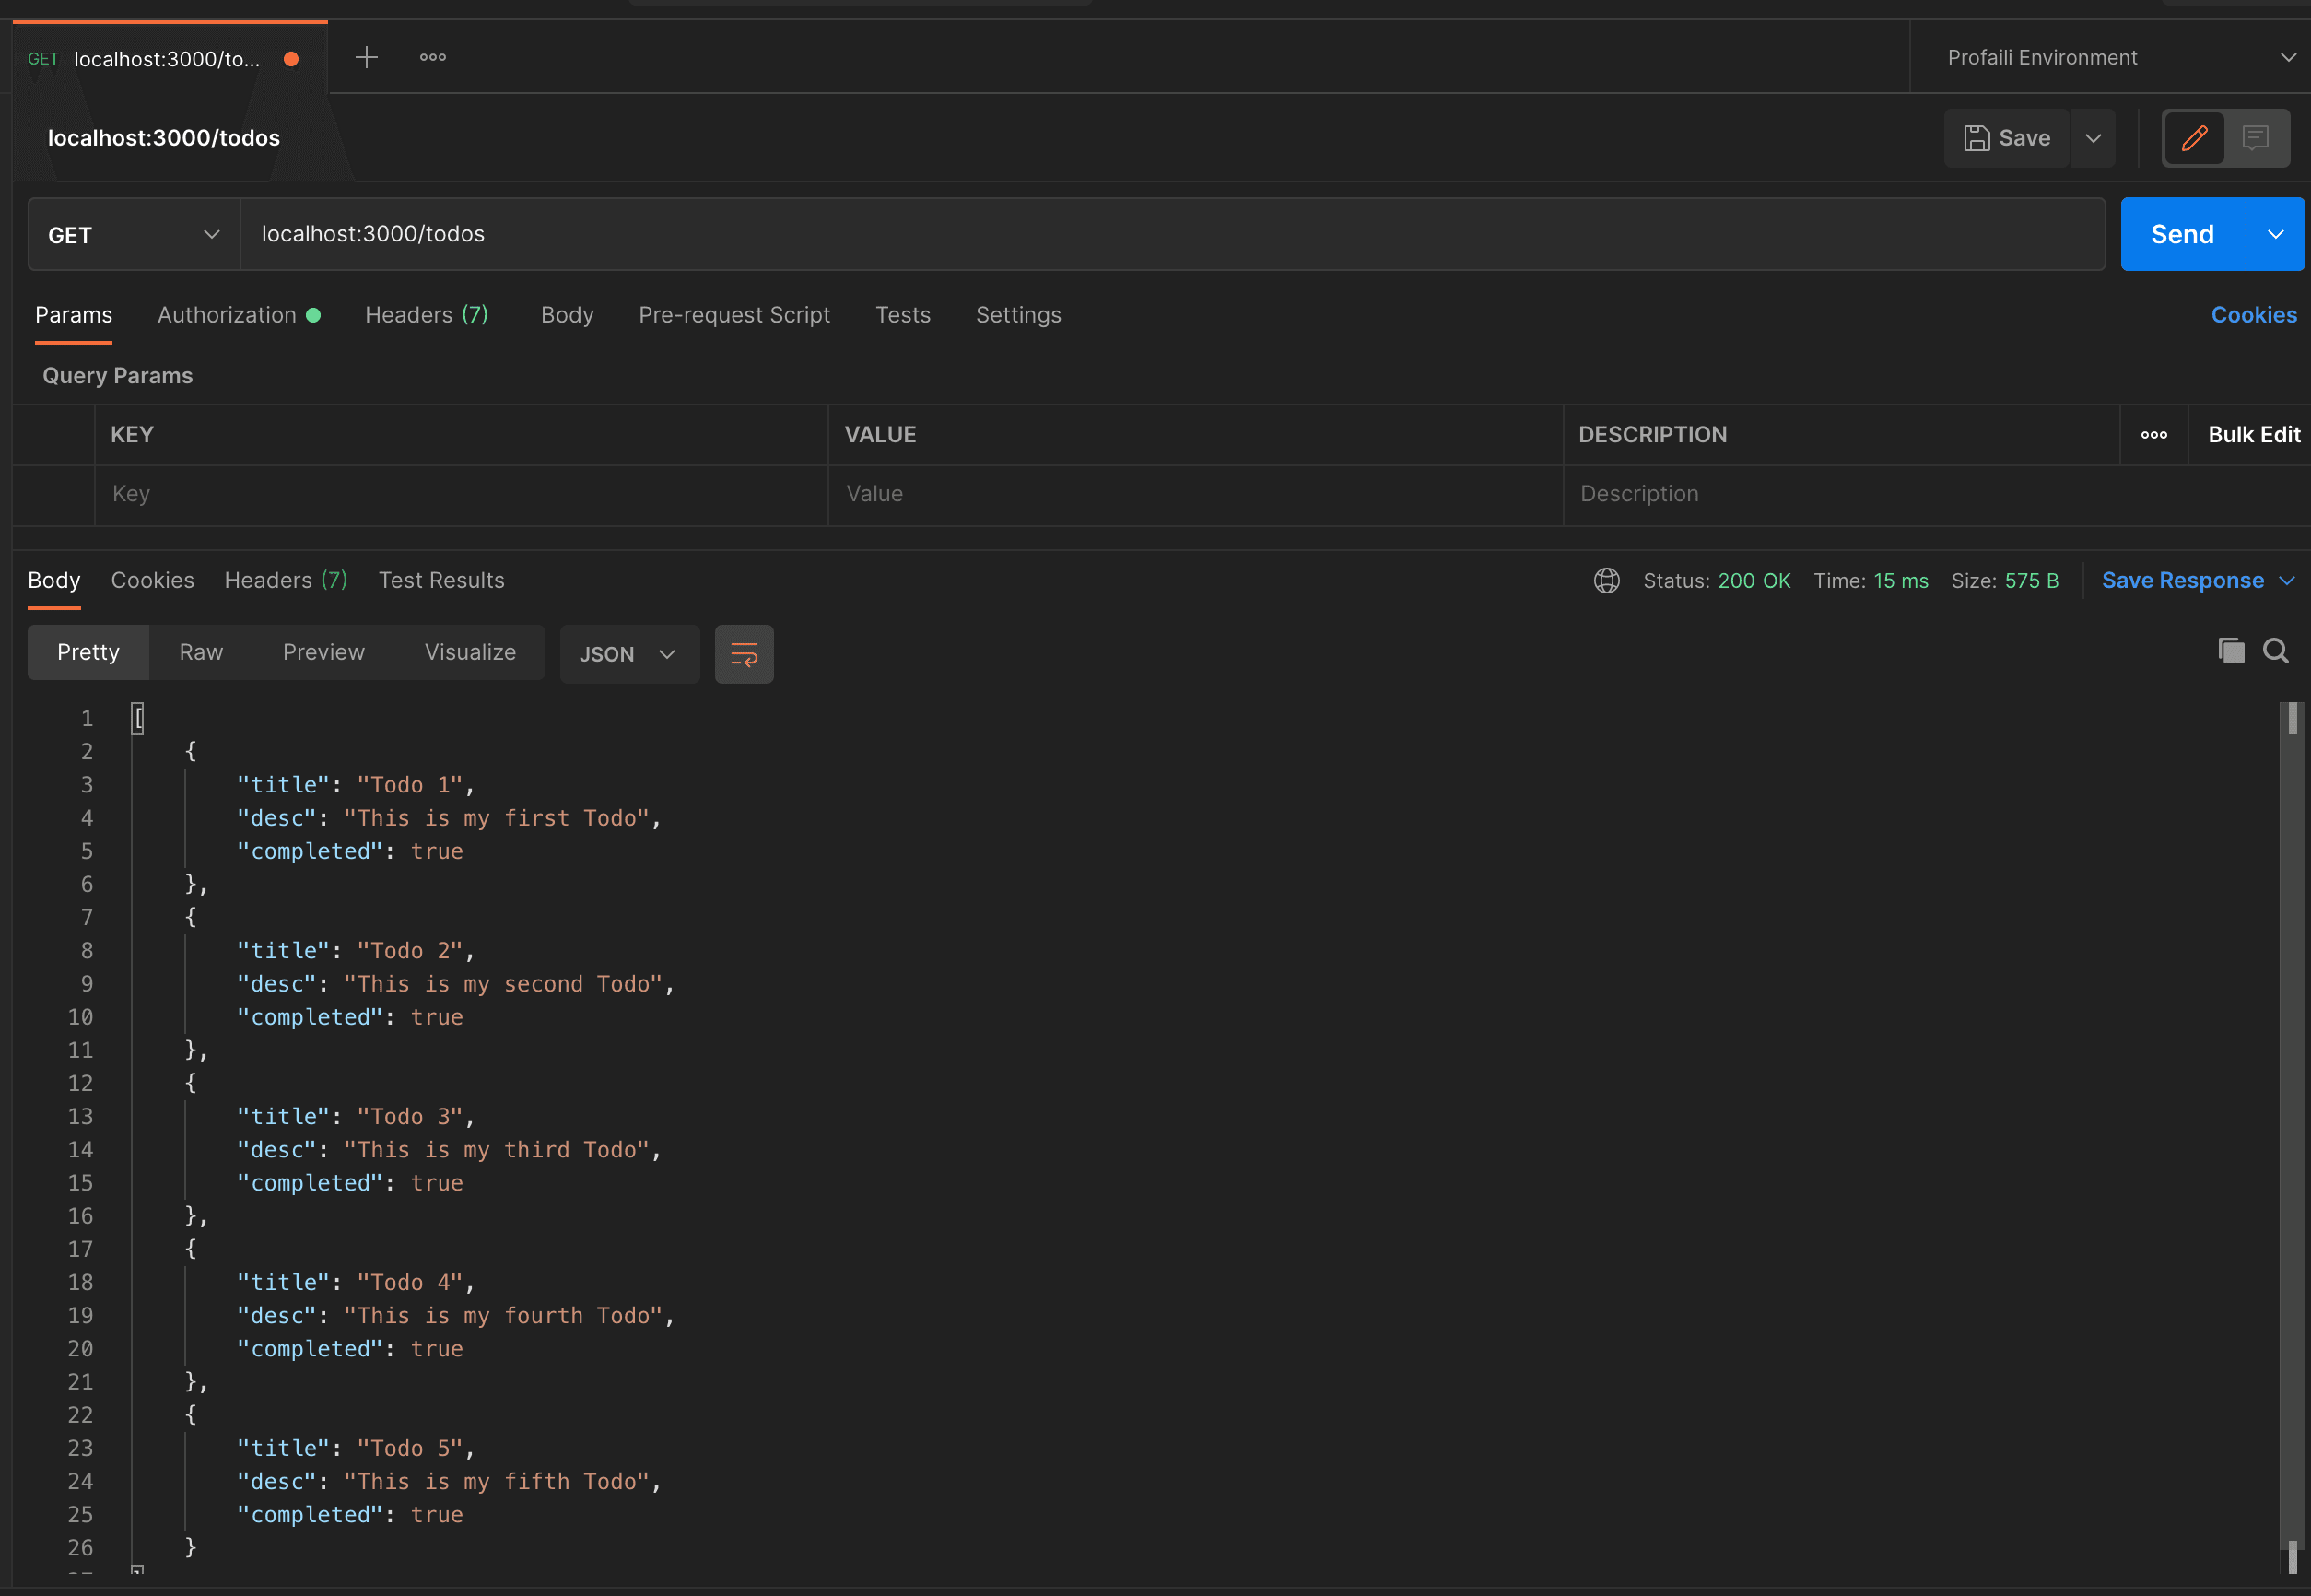
Lastly, we will look at how to test your Node API using Postman. You can use any HTTP client, like your browser, etc.
Testing your Node API
Start your project using the command below, and if everything works successfully, you should be greeted with the Server is running message in your terminal:
npm run start
Next, open your Postman and send a GET request to [localhost:3000/api/todos](<http://localhost:3000/api/todos>) Endpoint. If everything is properly set up. You should have a response similar to the one below: