How to install Docker
Docker is one of the easiest applications to install on your local machine.
However, it depends greatly on the operating system your local machine is running on and I hope its Mac 😎
Nevertheless, Docker runs flawlessly on all major operating systems such as Mac, Windows, and Linux with Mac being the easiest. We will learn to install Docker on these three major operating systems.
Install Docker on Mac
To install Docker on Mac, simply go to the Docker Download page and download the latest version of Docker. Click on the Download for Mac (stable) button for Mac.
After downloading successfully, you will get an Apple Disk Image file which you can open and click on the application file to start the installation. All you have to do is drag the file and drop it in your Applications directory.
 You can start Docker by simply double-clicking the application icon. Once the application starts, you'll see the Docker icon appear on your menu bar.
![]() Now, open up the terminal and execute
Now, open up the terminal and execute docker --version and docker-compose --version to ensure the success of the installation.
Install Docker on Windows
Installing Docker in Windows is almost the same with only a few changes and extra steps that you’ll need to go through. The installation steps are as follows:
Visit this site and follow the instructions for installing WSL2 on Windows 10 or later.
Then go to the official download page and click the Download for Windows (stable) button.
Double-click the downloaded installer and go through the installation with the defaults.
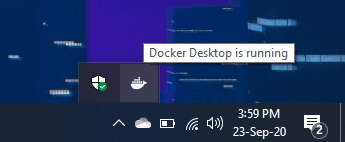
Once the installation is done, click Docker Desktop either from the start menu or your desktop to start the Docker engine. The docker icon should show up on your taskbar.
 Lastly, open up Ubuntu or whatever distribution you've installed from Microsoft Store. Execute the
 docker --version and docker-compose --version commands to make sure that the installation was successful.
 You can access Docker from your regular Command Prompt or PowerShell as well.
Install Docker on Linux
Installing Docker in Linux is a bit different because Linux has different distributions and each comes with different installation files and processes.
Also, when you install the Docker Desktop package on Windows or Mac, it comes with a collection of tools like Docker Engine, Docker Compose, Docker Dashboard, Kubernetes, and a few other goodies.
However, on Linux, you don’t get such a bundle. Instead, you install all the necessary tools you need manually. Installation procedures for different distributions are as follows:
If you’re on Ubuntu, you may follow the Install Docker Engine on Ubuntu section from the official docs.
For other distributions, installation per distribution guides are available on the official docs.
If you’re on a distribution that is not listed in the docs, you may follow the Install Docker Engine from the binaries guide instead.
Regardless of the procedure you follow, you’ll have to go through some Post-installation steps for Linux which are very important.
Once you’re done with the Docker installation, you’ll have to install another tool named Docker Compose. You may follow the Install Docker Compose guide from the official docs.
If you follow the instruction for Ubuntu, once the installation is done, open up the terminal and execute docker --version and docker-compose --version to ensure the success of the installation.
 Now that we have installed Docker, let’s look at how to dockerize a JavaScript application with Docker.


